Gyro Air G-700: Remote Receiver Wiring Configuration (Inovance VFD)

Created by Gabriel Izzo, Modified on Tue, 19 May at 3:23 PM by Gabriel Izzo

Gyro Air G-700 · Wiring
Remote Receiver Wiring Configuration — Inovance VFD
Applicable Model
Gyro Air G-700 — Inovance VFD Models Only

Use this guide to verify the correct wiring configuration for the remote receiver on the Inovance version of the G-700. Follow each confirmation step carefully to ensure all connections are properly seated.

Electrical Safety — Read Before Proceeding
+
Disconnect the machine from power and allow a minimum of 10 minutes for internal capacitors in the VFD to fully discharge before servicing. Always verify voltage has dissipated using a properly rated multimeter before touching any internal electrical components.
+
Use insulated tools when working on electrical components to reduce the risk of electric shock.
+
Handle wiring carefully — rough handling can damage connections or accidentally expose live wires.
+
If you are not confident working with electrical components, contact our support team or a qualified electrician before proceeding.
Receiver Wire Connections — Quick Reference

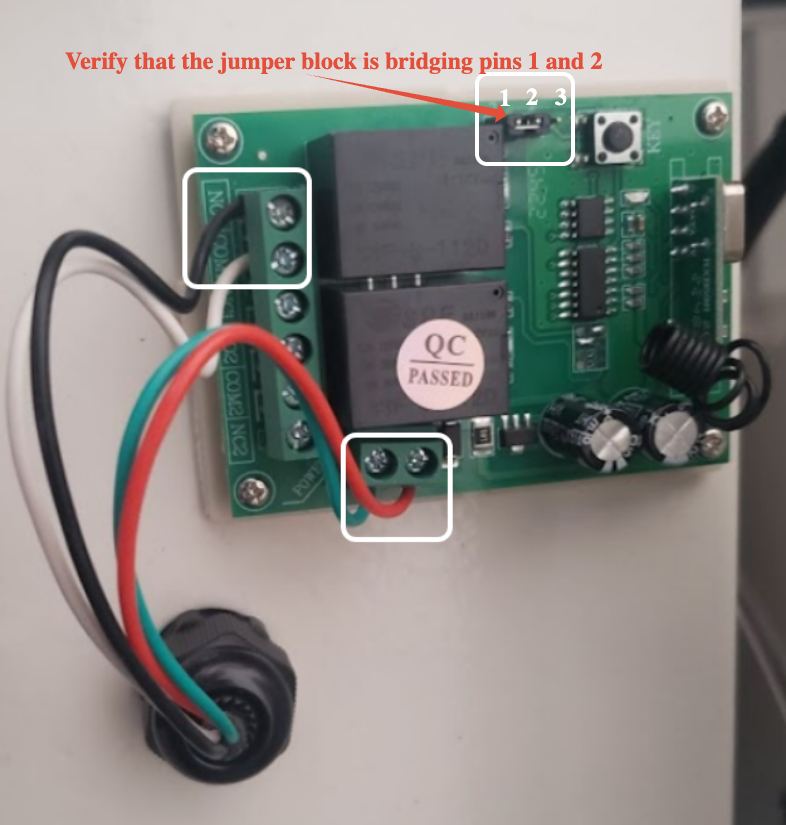
The wires should be connected to the receiver in the following configuration, with the jumper block bridging pins 1 and 2:

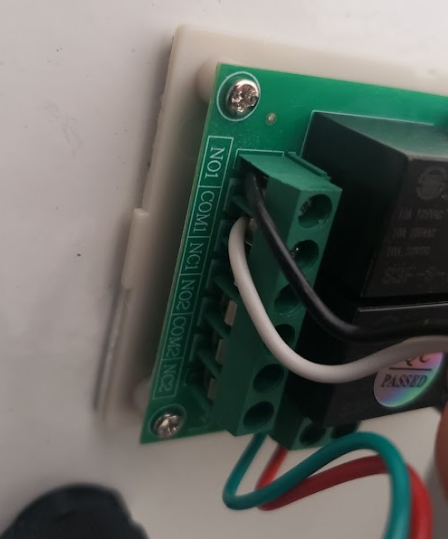
■ Black wire → NO1
■ White wire → COM1
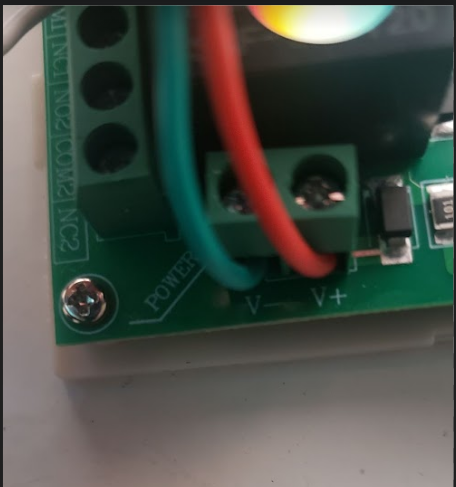
■ Green wire → V−
■ Red wire → V+
Wiring Confirmation Steps
1
Confirm Receiver Wire Connections & Jumper Block

Confirm that the four wires are connected to the receiver as shown in the quick reference above, and that the jumper block is bridging pins 1 and 2.

Fig. 1 — Full Receiver Wiring Configuration
Full receiver wiring configuration
Fig. 2 — NO1 & COM1 Close-Up (Black & White Wires)
NO1 and COM1 close-up showing black and white wire connections
Fig. 3 — V− & V+ Close-Up (Green & Red Wires)
V- and V+ close-up showing green and red wire connections
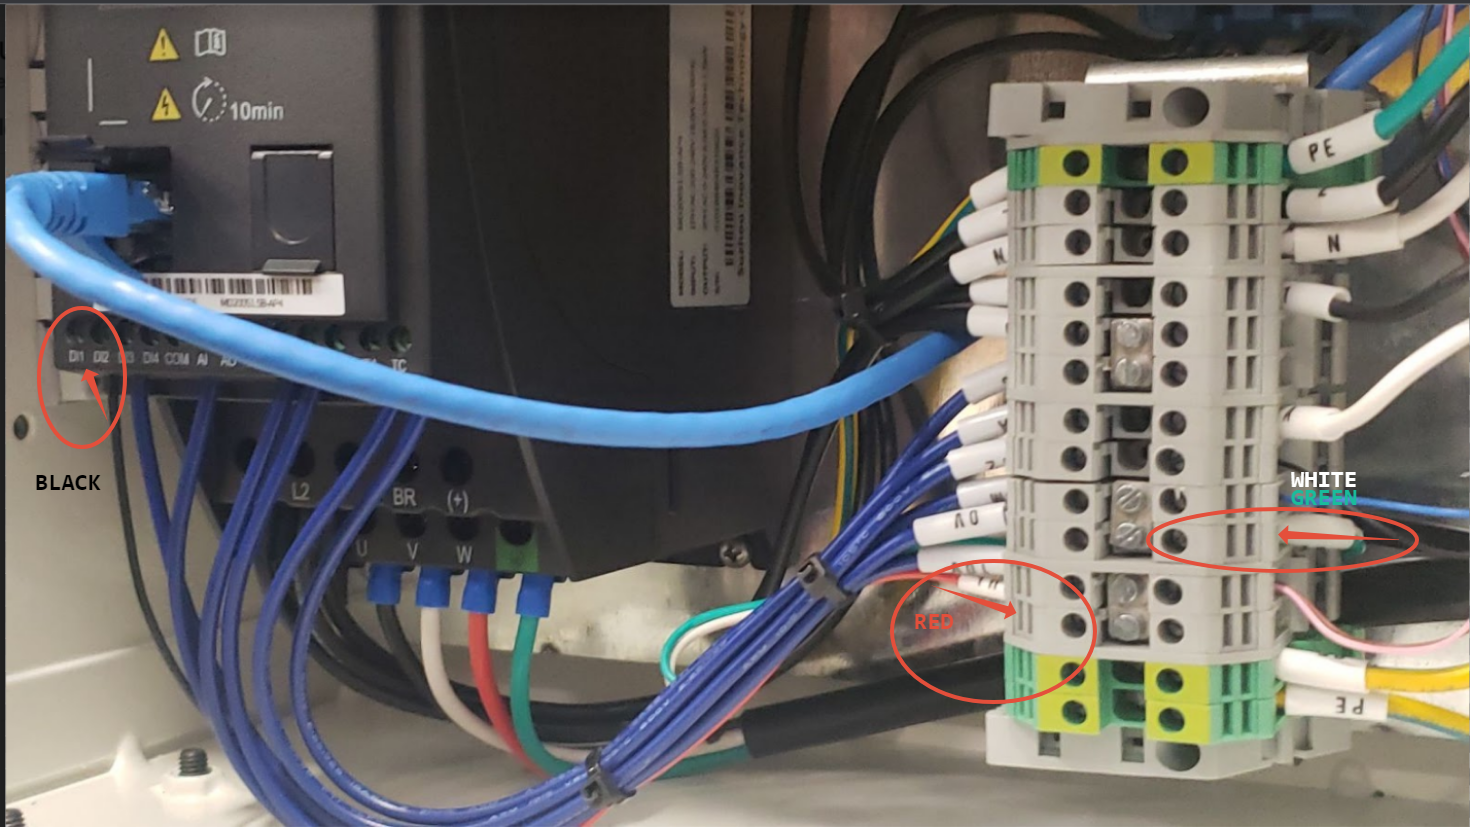
Fig. 4 — Receiver Wiring Overview Inside Electrical Box
Overview of receiver wiring inside the electrical box
2
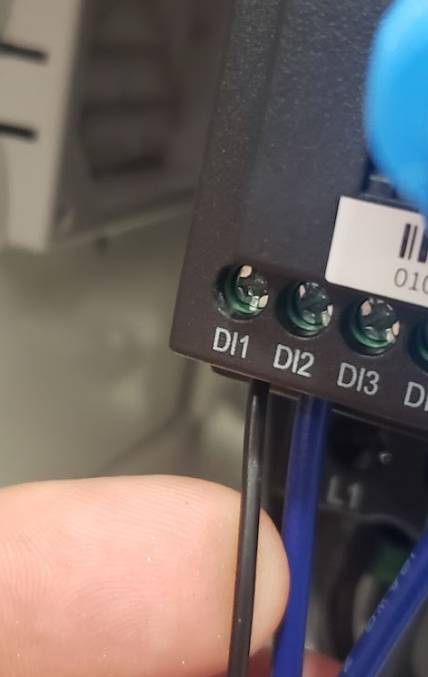
Confirm Black Wire — NO1 to Terminal D|1 on VFD

Confirm the Black wire from the NO1 connection on the receiver is connected to terminal D|1 on the front left side of the VFD (Variable Frequency Drive).

Fig. 5 — Black Wire NO1 to VFD Terminal D|1
Black wire from NO1 connected to VFD terminal D1
3
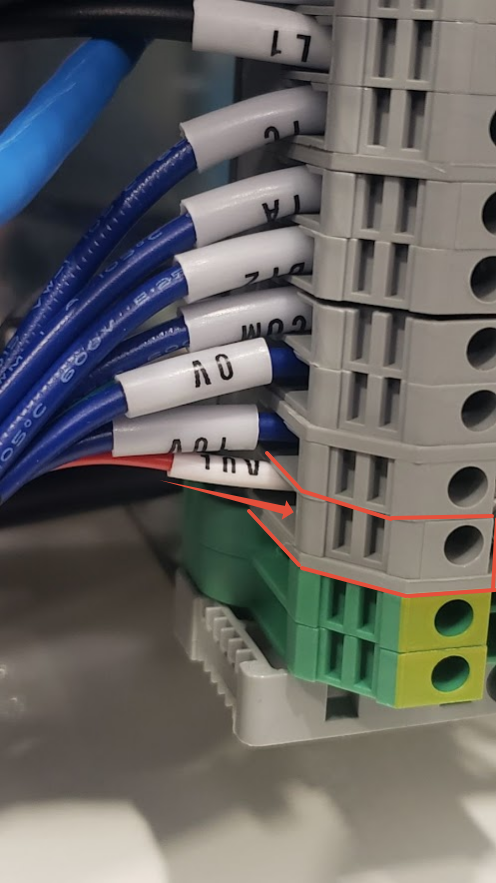
Confirm Red Wire — V+ to Terminal Block (Left Side, Position 3)

Confirm the Red wire from V+ on the receiver is connected to the terminal position 3 up from the bottom on the left side of the terminal block, as shown in the photo below.

Fig. 6 — Red Wire V+ to Terminal Block (Left, Position 3)
Red wire from V+ connected to terminal block left side position 3
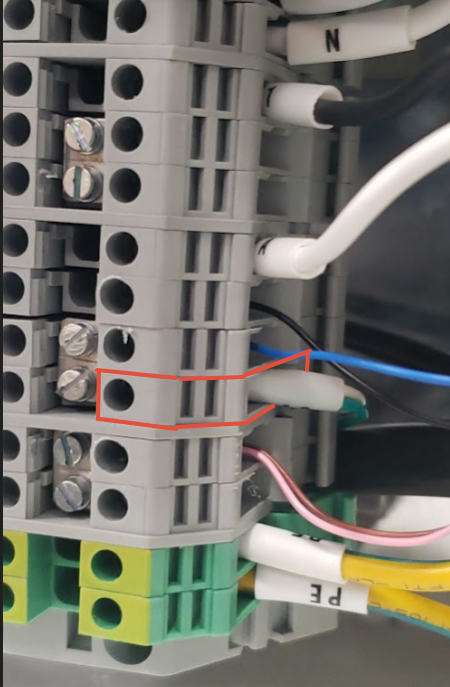
Confirm White & Green Wires — COM1 & V− to Terminal Block (Right Side, Position 5)

Confirm that both the White wire (from COM1) and the Green wire (from V−) are connected to the terminal position 5 up from the bottom on the right side of the terminal block, as shown in the photo below.

Fig. 7 — White & Green Wires COM1 & V− to Terminal Block (Right, Position 5)
White and green wires from COM1 and V- connected to terminal block right side position 5
i

For further assistance with wiring or remote pairing, please contact our support team.

Was this article helpful?

That’s Great!

Thank you for your feedback

Sorry! We couldn't be helpful

Thank you for your feedback

Let us know how can we improve this article!

Select at least one of the reasons
CAPTCHA verification is required.

Feedback sent

We appreciate your effort and will try to fix the article