Big Eye Fence System FAQ: Replacing the Fence Slider Viewers

Created by Gabriel Izzo, Modified on Tue, 2 Jun at 2:24 PM by Gabriel Izzo

Harvey Industries · Big Eye Rip Fence · Repair Guide
Replacing the Fence Slider Viewer — UV Resin Glue-In
Applicable Models
Big Eye B-70 Bandsaw Fence
Big Eye B-36 Rip Fence
Big Eye B-52 Rip Fence

The fence slider viewer on the Big Eye B-70, B-36, and B-52 is a clear K9 crystal glass lens with a hairline scribe, bonded into the slider body with UV-cure resin. If the viewer is cracked, cloudy/worn, or has come loose, it can be replaced using a heat gun to release the old adhesive and fresh UV resin to reinstall the new viewer. This guide walks through the full removal and installation process.
⚠ Safety — Read Before Beginning
? Heat Gun
Heat gun nozzles and surrounding metal reach temperatures exceeding 300–500°C and will cause serious burns on contact. Never touch the nozzle or any recently heated metal surface with bare hands.
Wear leather or heat-resistant gloves when handling any part of the fence body after heating. The aluminum body retains heat and will be hot to the touch after the heat gun is applied.
Direct heat gun airflow at the viewer socket only. Do not direct hot air at flammable materials, work surfaces, or other components nearby. Keep the work area clear.
Set the heat gun down on a heat-safe surface with the nozzle pointing away from you and others while it cools. Never set a hot heat gun on a work cloth or wood surface.
■ Broken or Cracked Viewer Glass
If the existing viewer is cracked or shattered, wear cut-resistant or leather gloves at all times when handling the fence body during the removal phase. Broken viewer glass edges are sharp!
Wear safety glasses during removal. Heating a cracked viewer may cause small fragments to dislodge unexpectedly.
Collect and dispose of any glass fragments carefully. Do not sweep broken glass with bare hands — use a cloth or tape to capture small shards.
☀ UV Resin & UV Curing Light
Wear nitrile gloves throughout the resin application steps. Uncured UV resin is a skin sensitizer — repeated skin contact can cause allergic reactions. Avoid contact with skin and eyes.
Never look directly into the UV curing light while it is operating. UV light causes eye damage with even brief direct exposure. Keep the UV light pointed away from people and reflected surfaces when in use.
Work in a well-ventilated area. UV resin emits fumes during dispensing and curing that may cause irritation with prolonged exposure in enclosed spaces.
Keep the UV resin bottle capped and away from ambient light and UV sources when not in use. Uncapped resin exposed to sunlight or workshop UV sources will cure prematurely in the bottle.
Tools & Materials Required
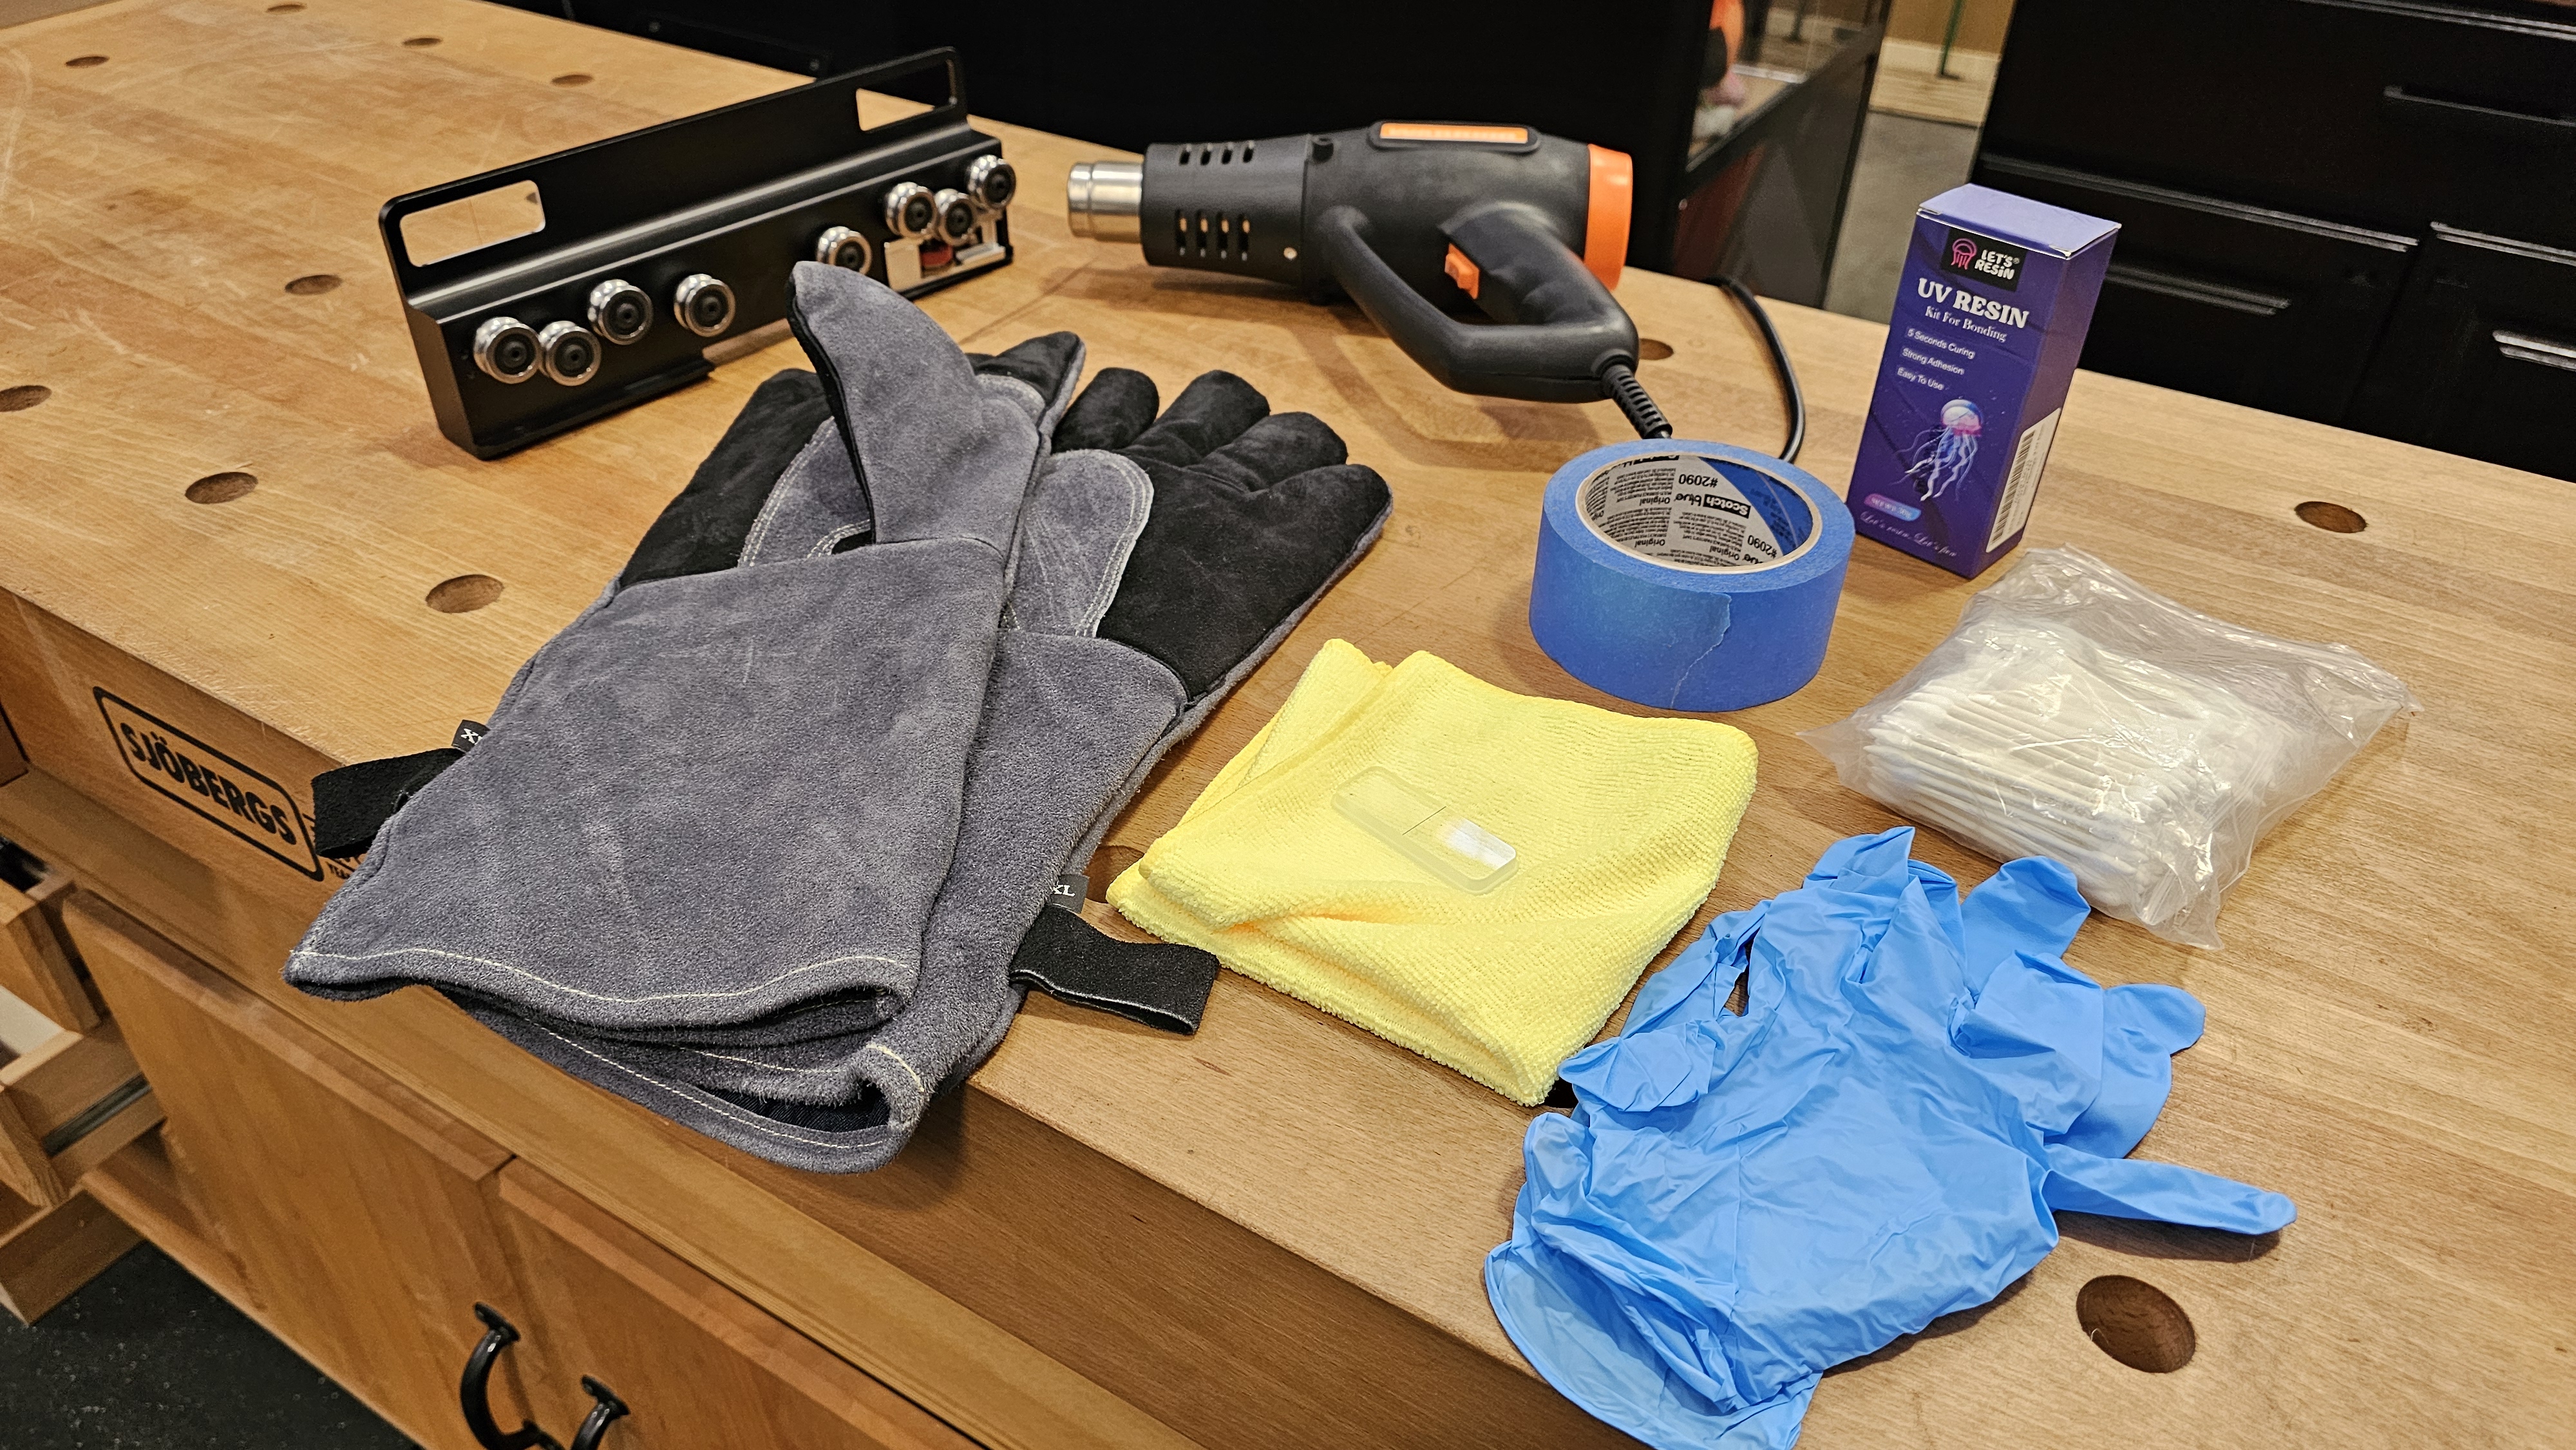
Heat gun Leather / heat & cut-resistant gloves Nitrile gloves Replacement viewer glass UV resin (bonding grade) UV curing light Cotton Q-tips / swabs Blue painter's tape (recommended but optional) Acetone or 99% isopropyl alcohol Microfiber cloths
Tools & Materials — Reference Photo
Step 1 — Tools and materials required: heat gun, leather gloves, nitrile gloves, microfiber cloth, replacement viewer, blue tape, UV resin box, Q-tips
Removal Procedure
1
Heat the Viewer Socket with a Heat Gun
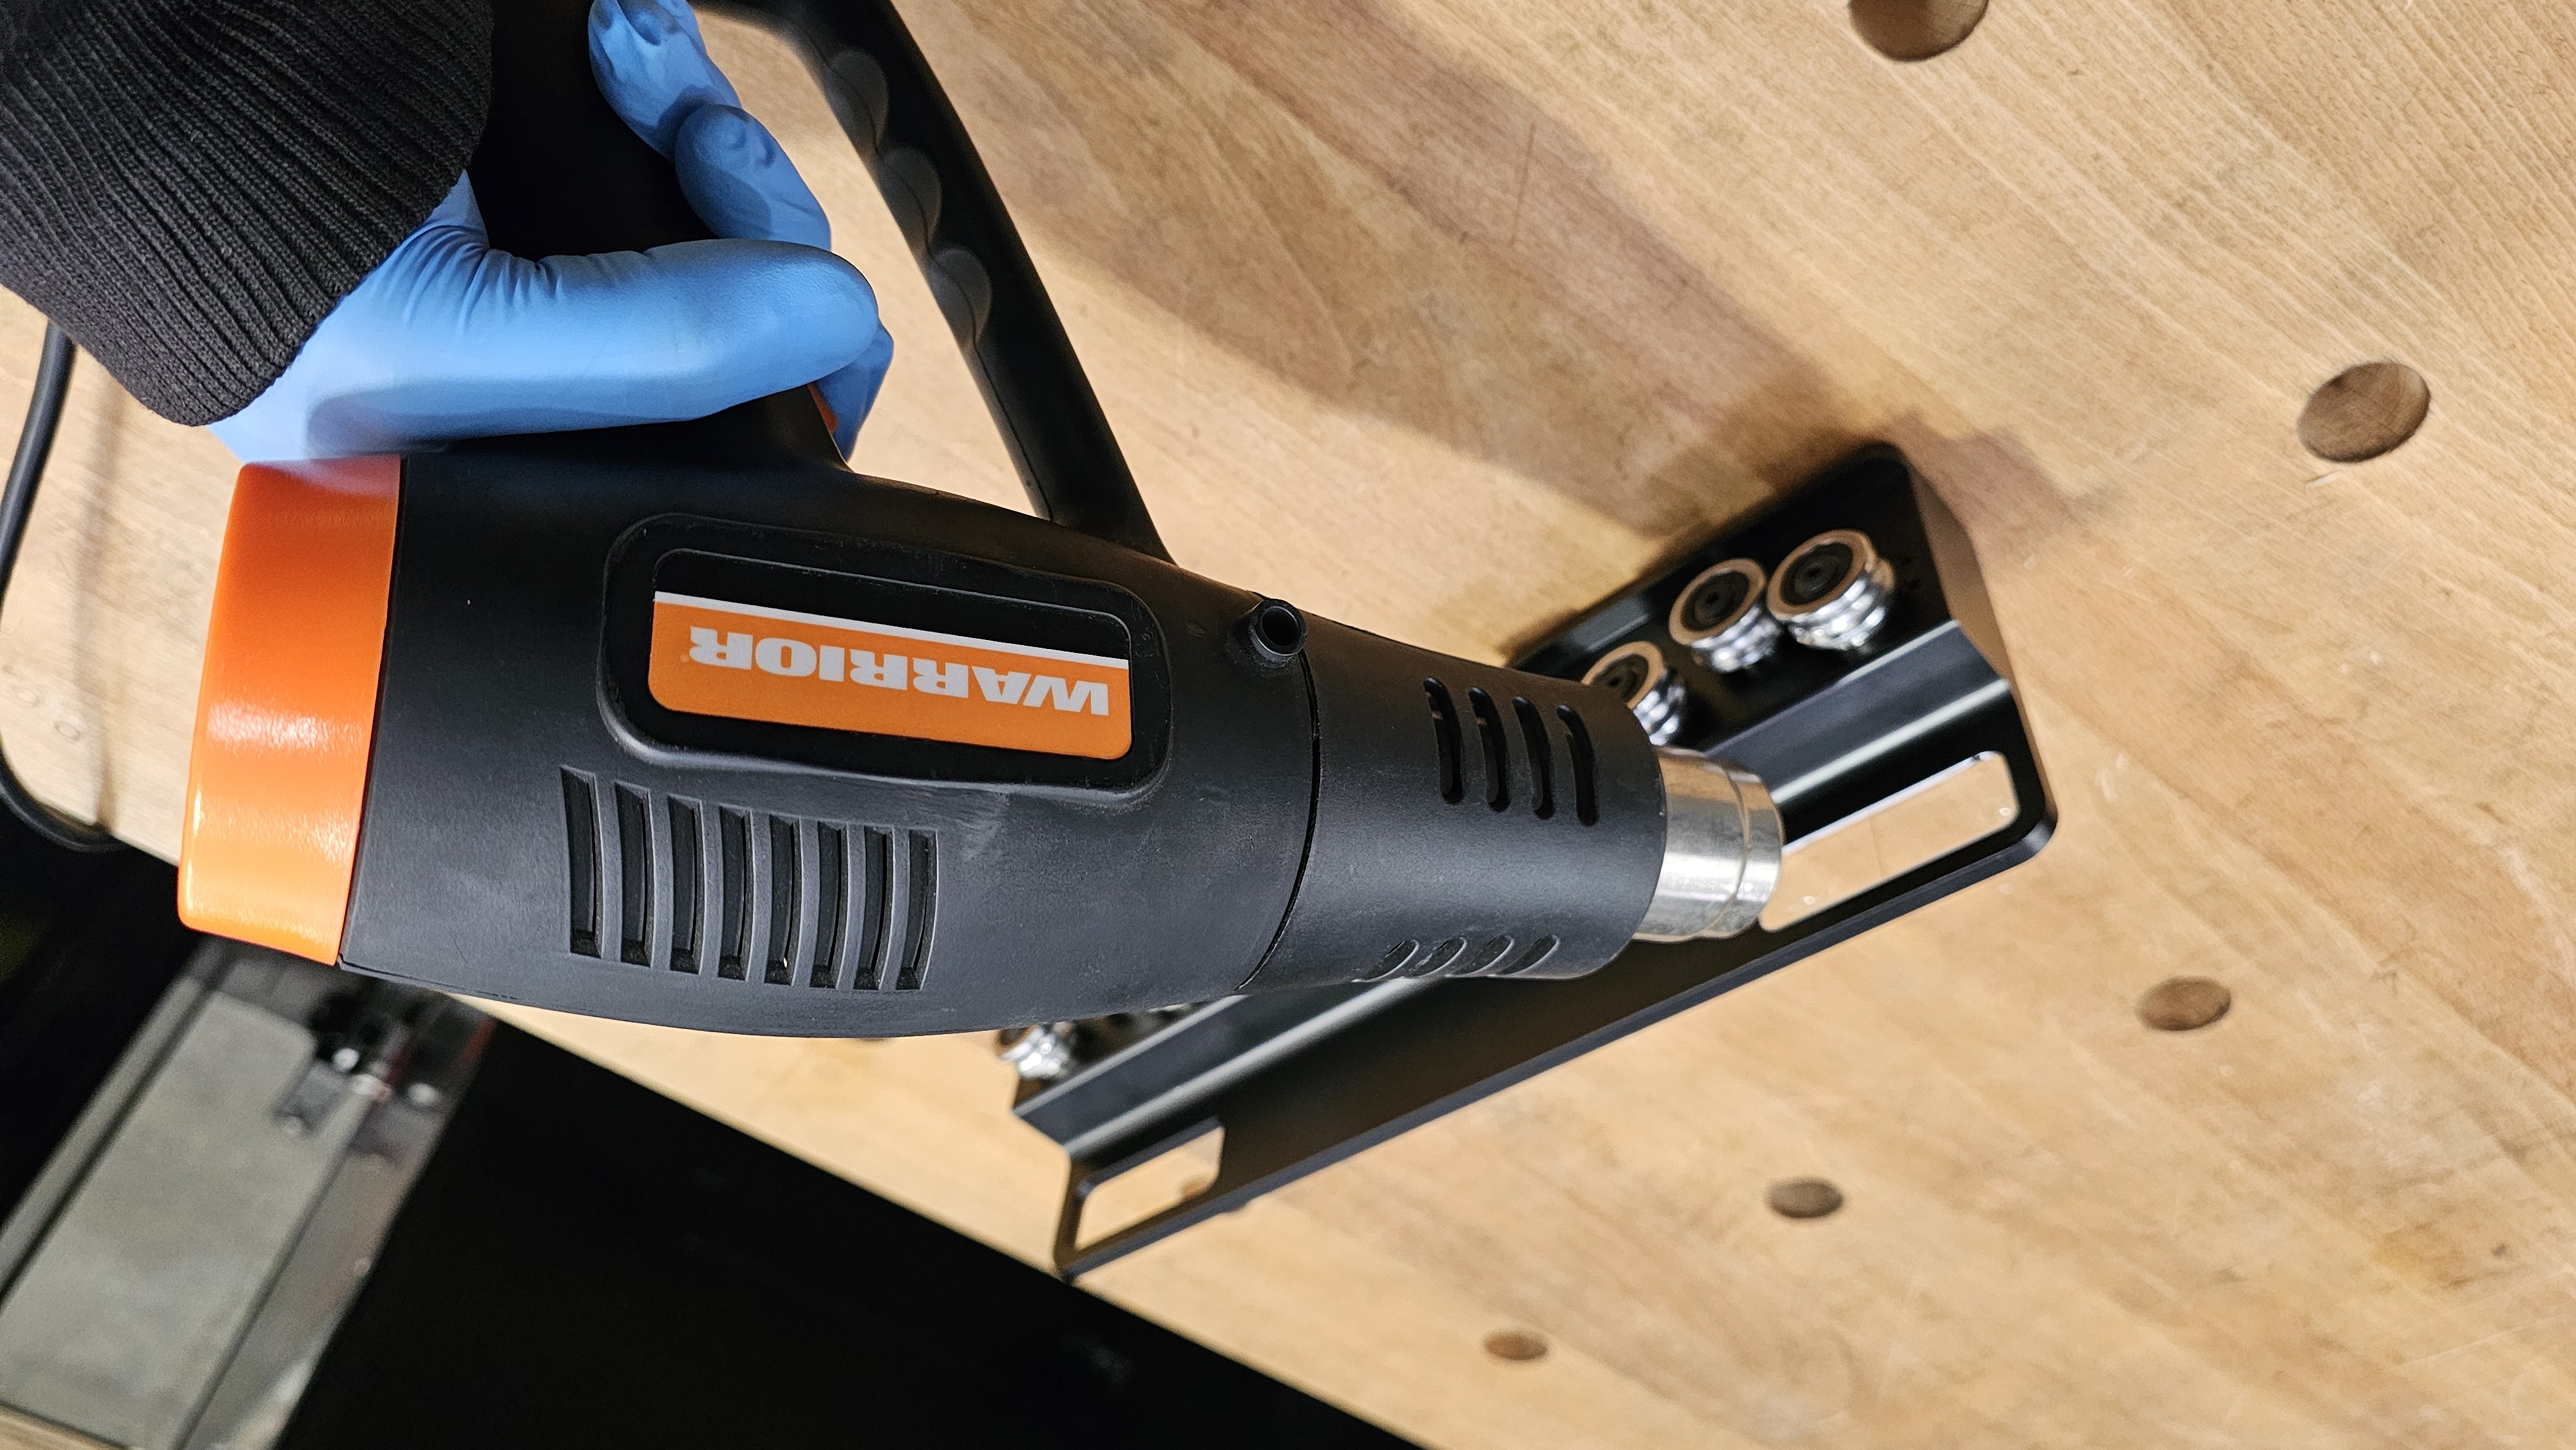
Place the fence slider body on a clean, heat-safe surface. Apply heat from the heat gun directly to the viewer socket area on the fence body, moving the gun slowly over the viewer and surrounding rim.
Apply heat for approximately 15–30 seconds until the UV resin bonding the viewer softens enough for the viewer to release. The viewer may shift slightly in its socket when the adhesive has softened.
Do not overheat — apply just enough heat to soften the resin, not to deform or discolor the surrounding body material.
Step 1 — Apply Heat Gun to Viewer Socket
Step 1 — heat gun applied to Big Eye fence slider viewer socket
2
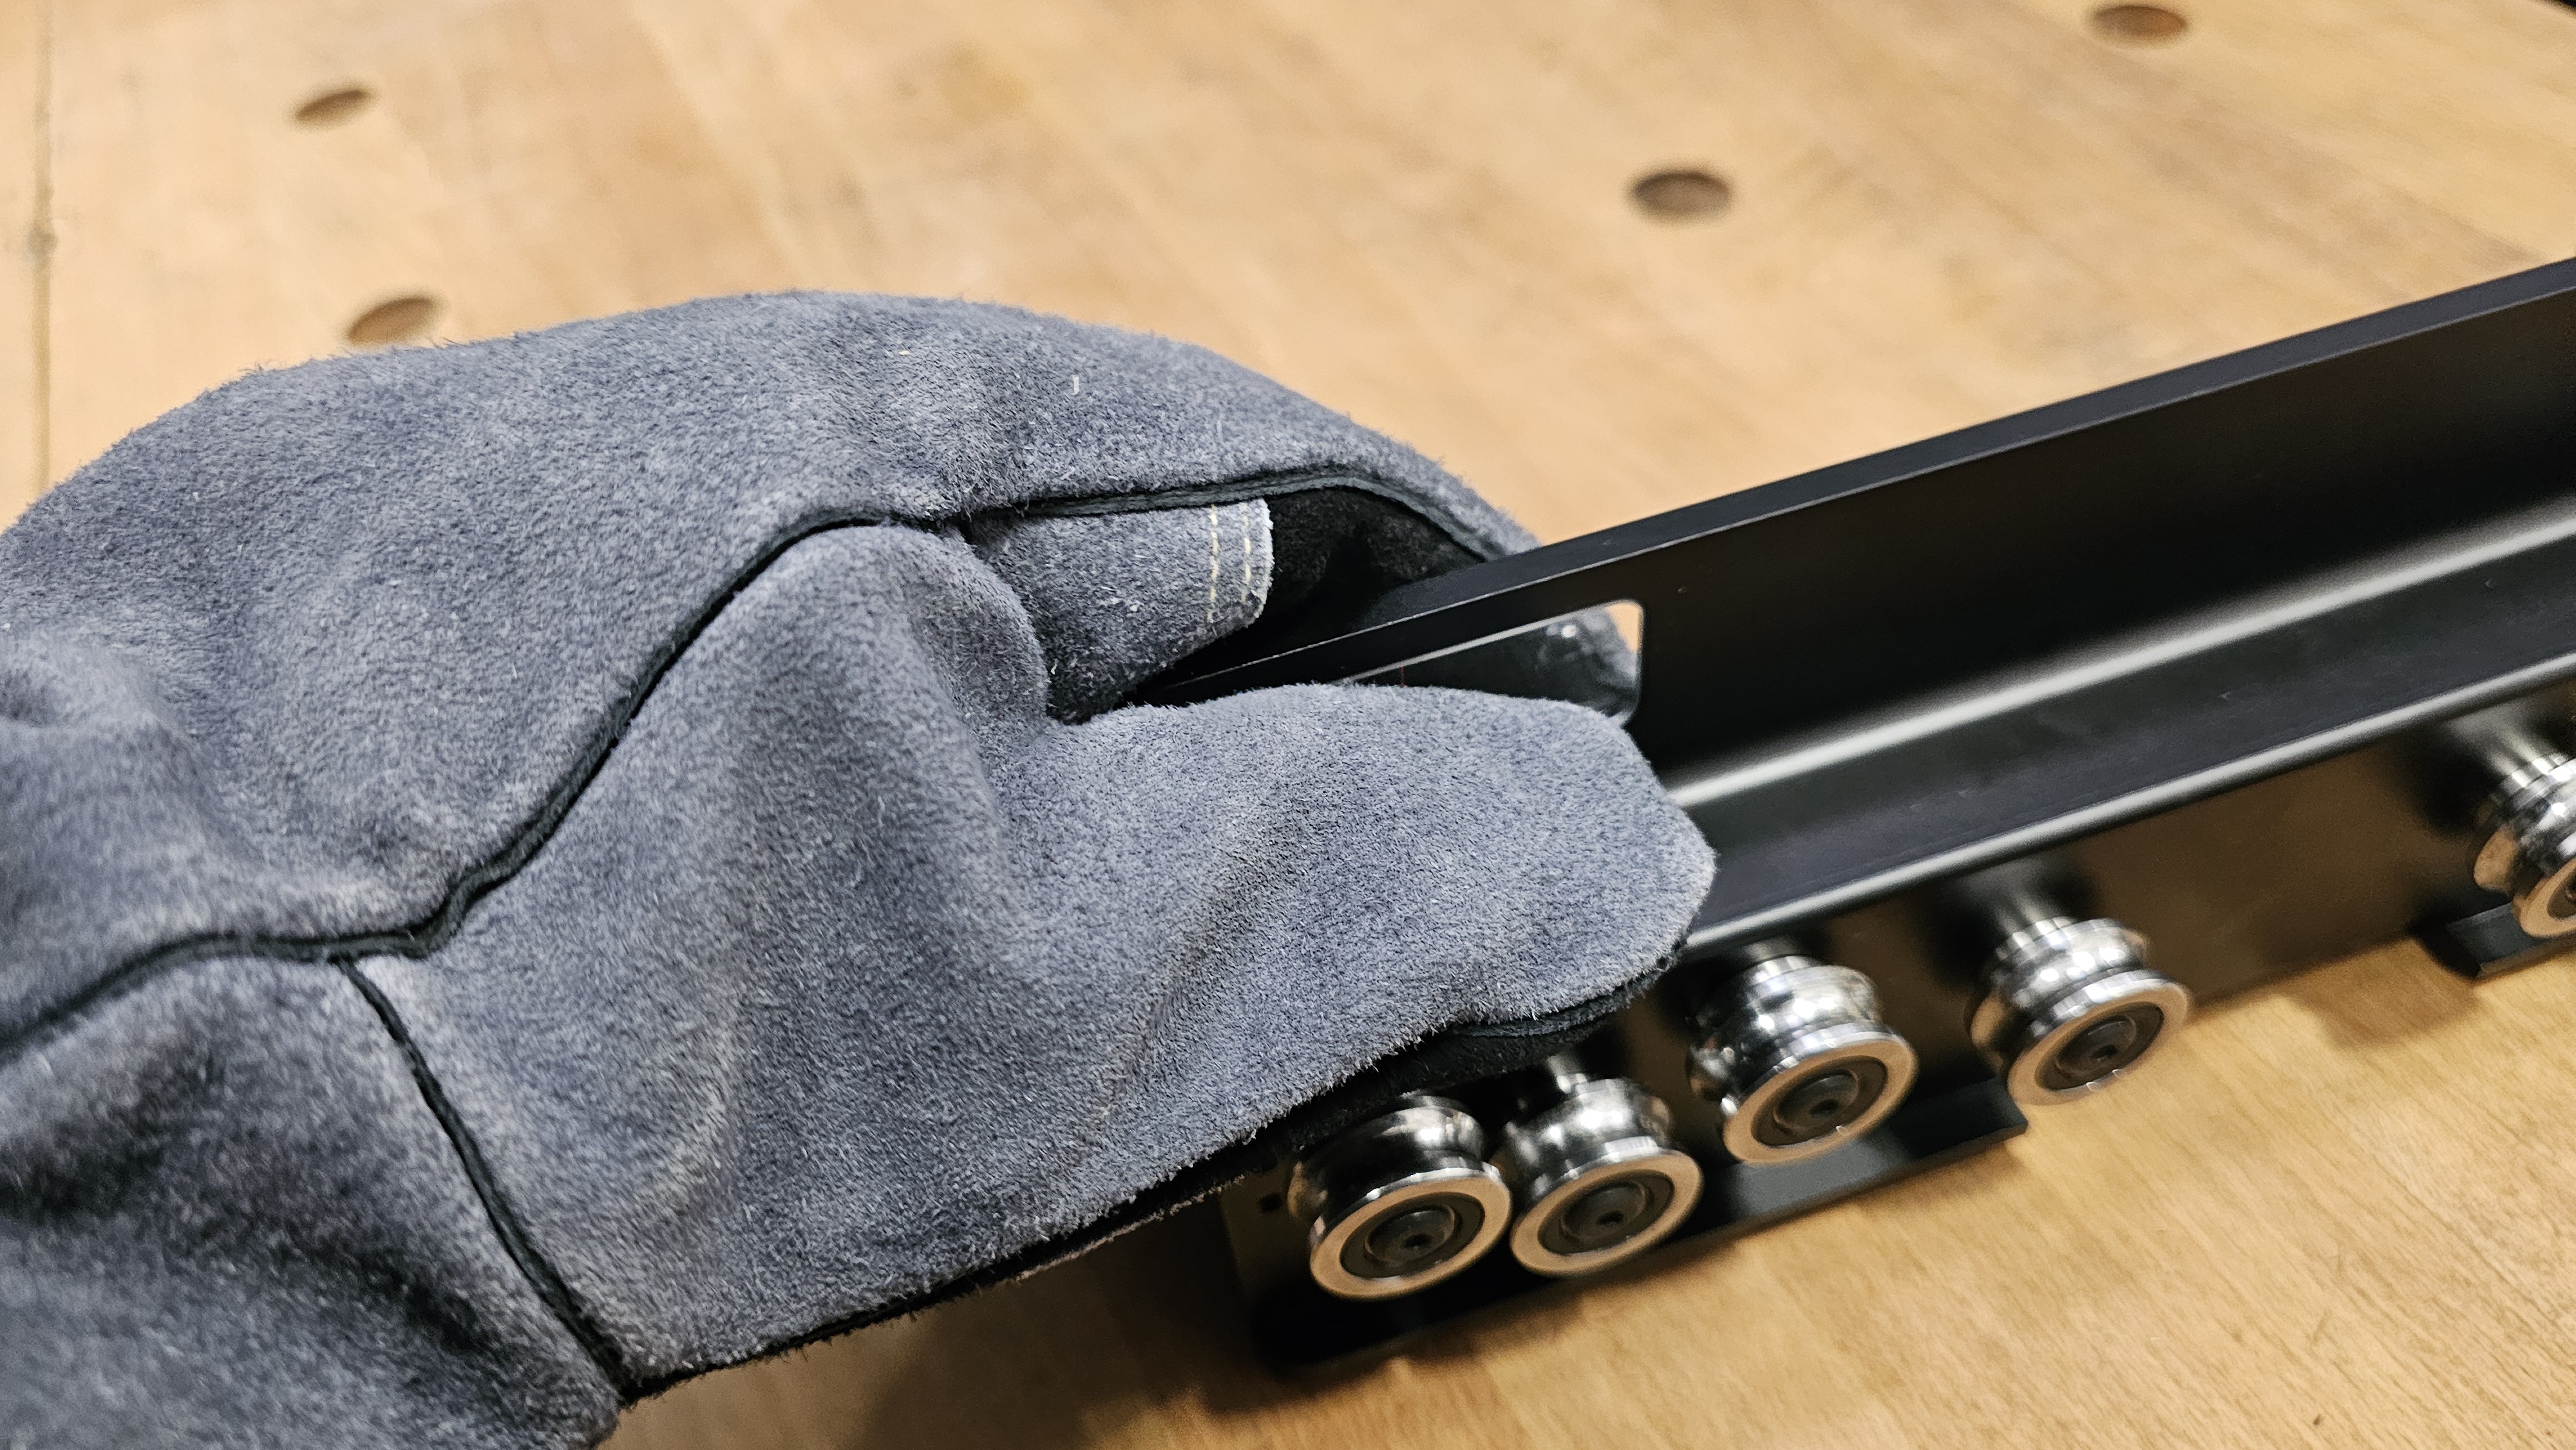
Remove the Old Viewer Using Heat/Cut-Resistant Gloves
With your leather or heat/cut-resistant gloves on, carefully handle the fence body and work the old viewer free from the socket. The softened resin should allow the viewer to pop or slide out with gentle pressure.
If the viewer does not release easily, apply additional heat and try again. Do not force the viewer out while the resin is still rigid — you may crack the viewer or damage the socket.
If the viewer is already cracked or broken, remove all fragments carefully. Wear safety glasses throughout this step.
Step 2 — Remove Viewer Using Heat-Resistant Gloves
Step 2 — leather glove gripping hot fence rail to remove viewer
3
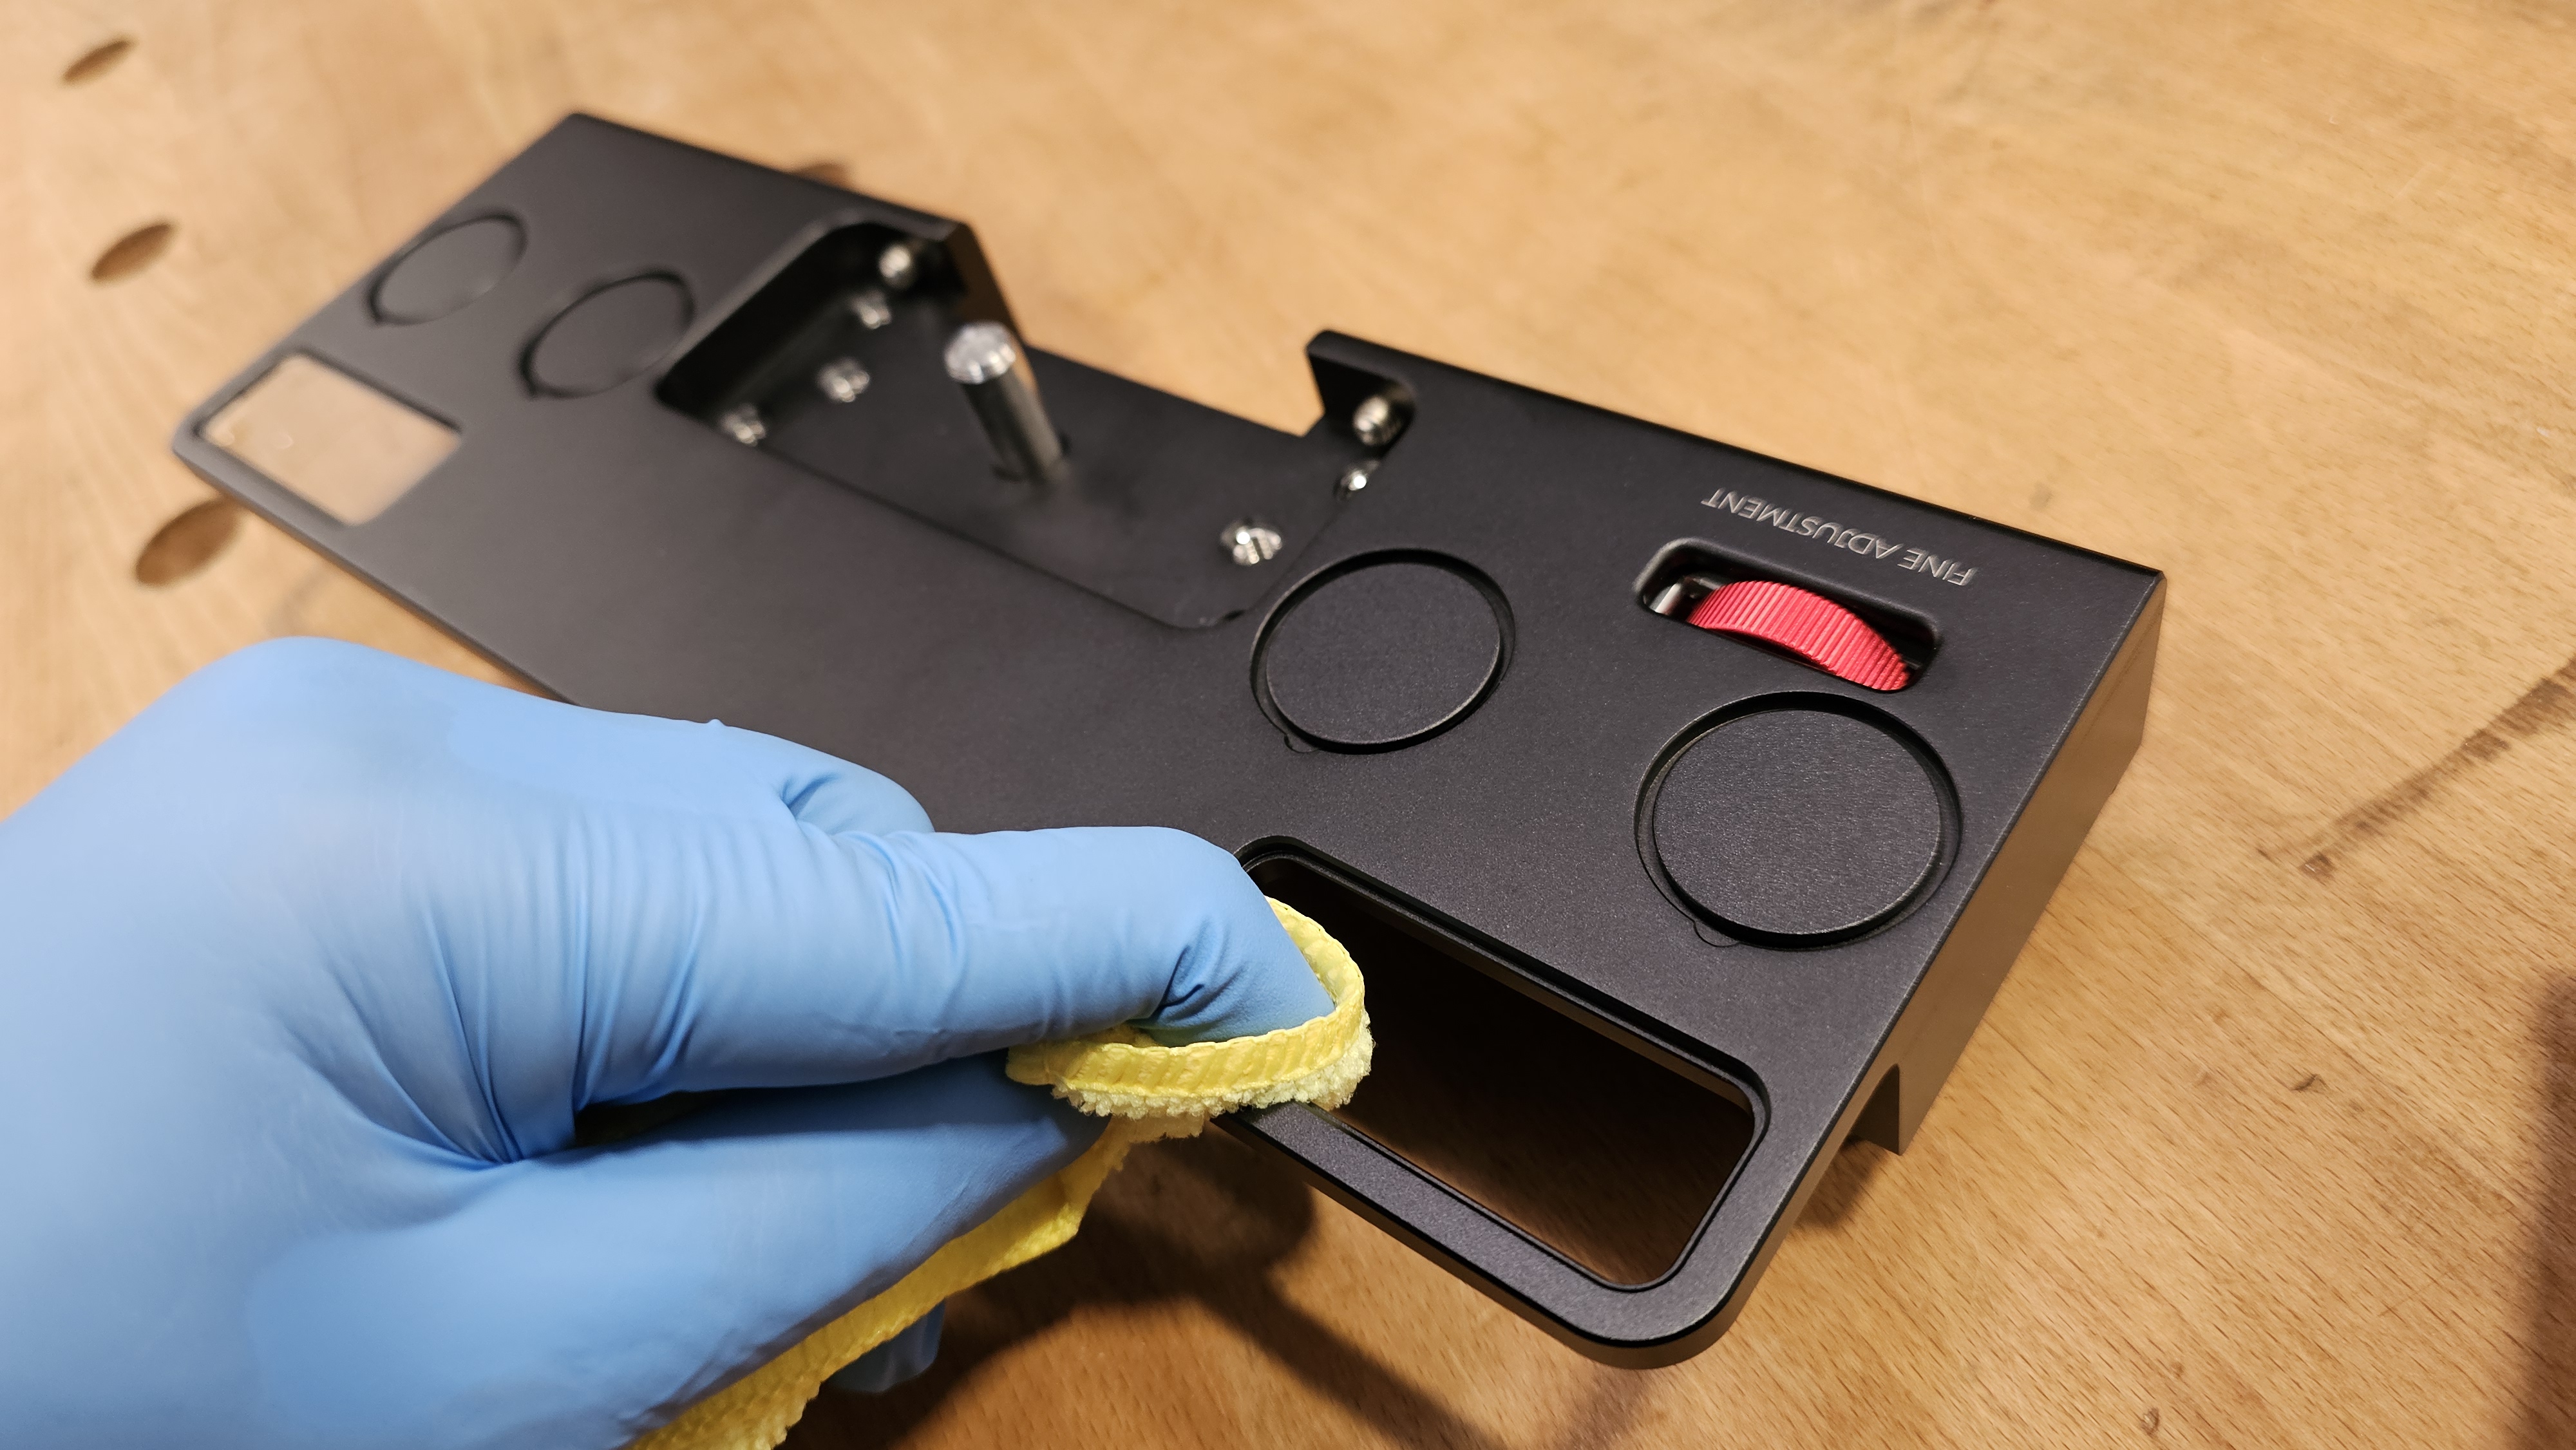
Clean the Viewer Socket
Allow the fence body to cool to room temperature before cleaning. Switch to nitrile gloves for this and all remaining steps.
Dampen a microfiber cloth or Q-tip with acetone or 99% isopropyl alcohol and wipe down the inside of the viewer socket thoroughly. Remove all remaining resin residue, dust, and oils manually using a plastic scraper and cleaning cloth. A clean socket is critical for a strong bond.
Allow the solvent to fully evaporate before proceeding. The socket should appear uniformly matte black with no shiny resin spots remaining.
Step 3 — Clean the Empty Viewer Socket
Step 3 — nitrile gloved hand cleaning empty viewer socket with microfiber cloth
Installation Procedure
4
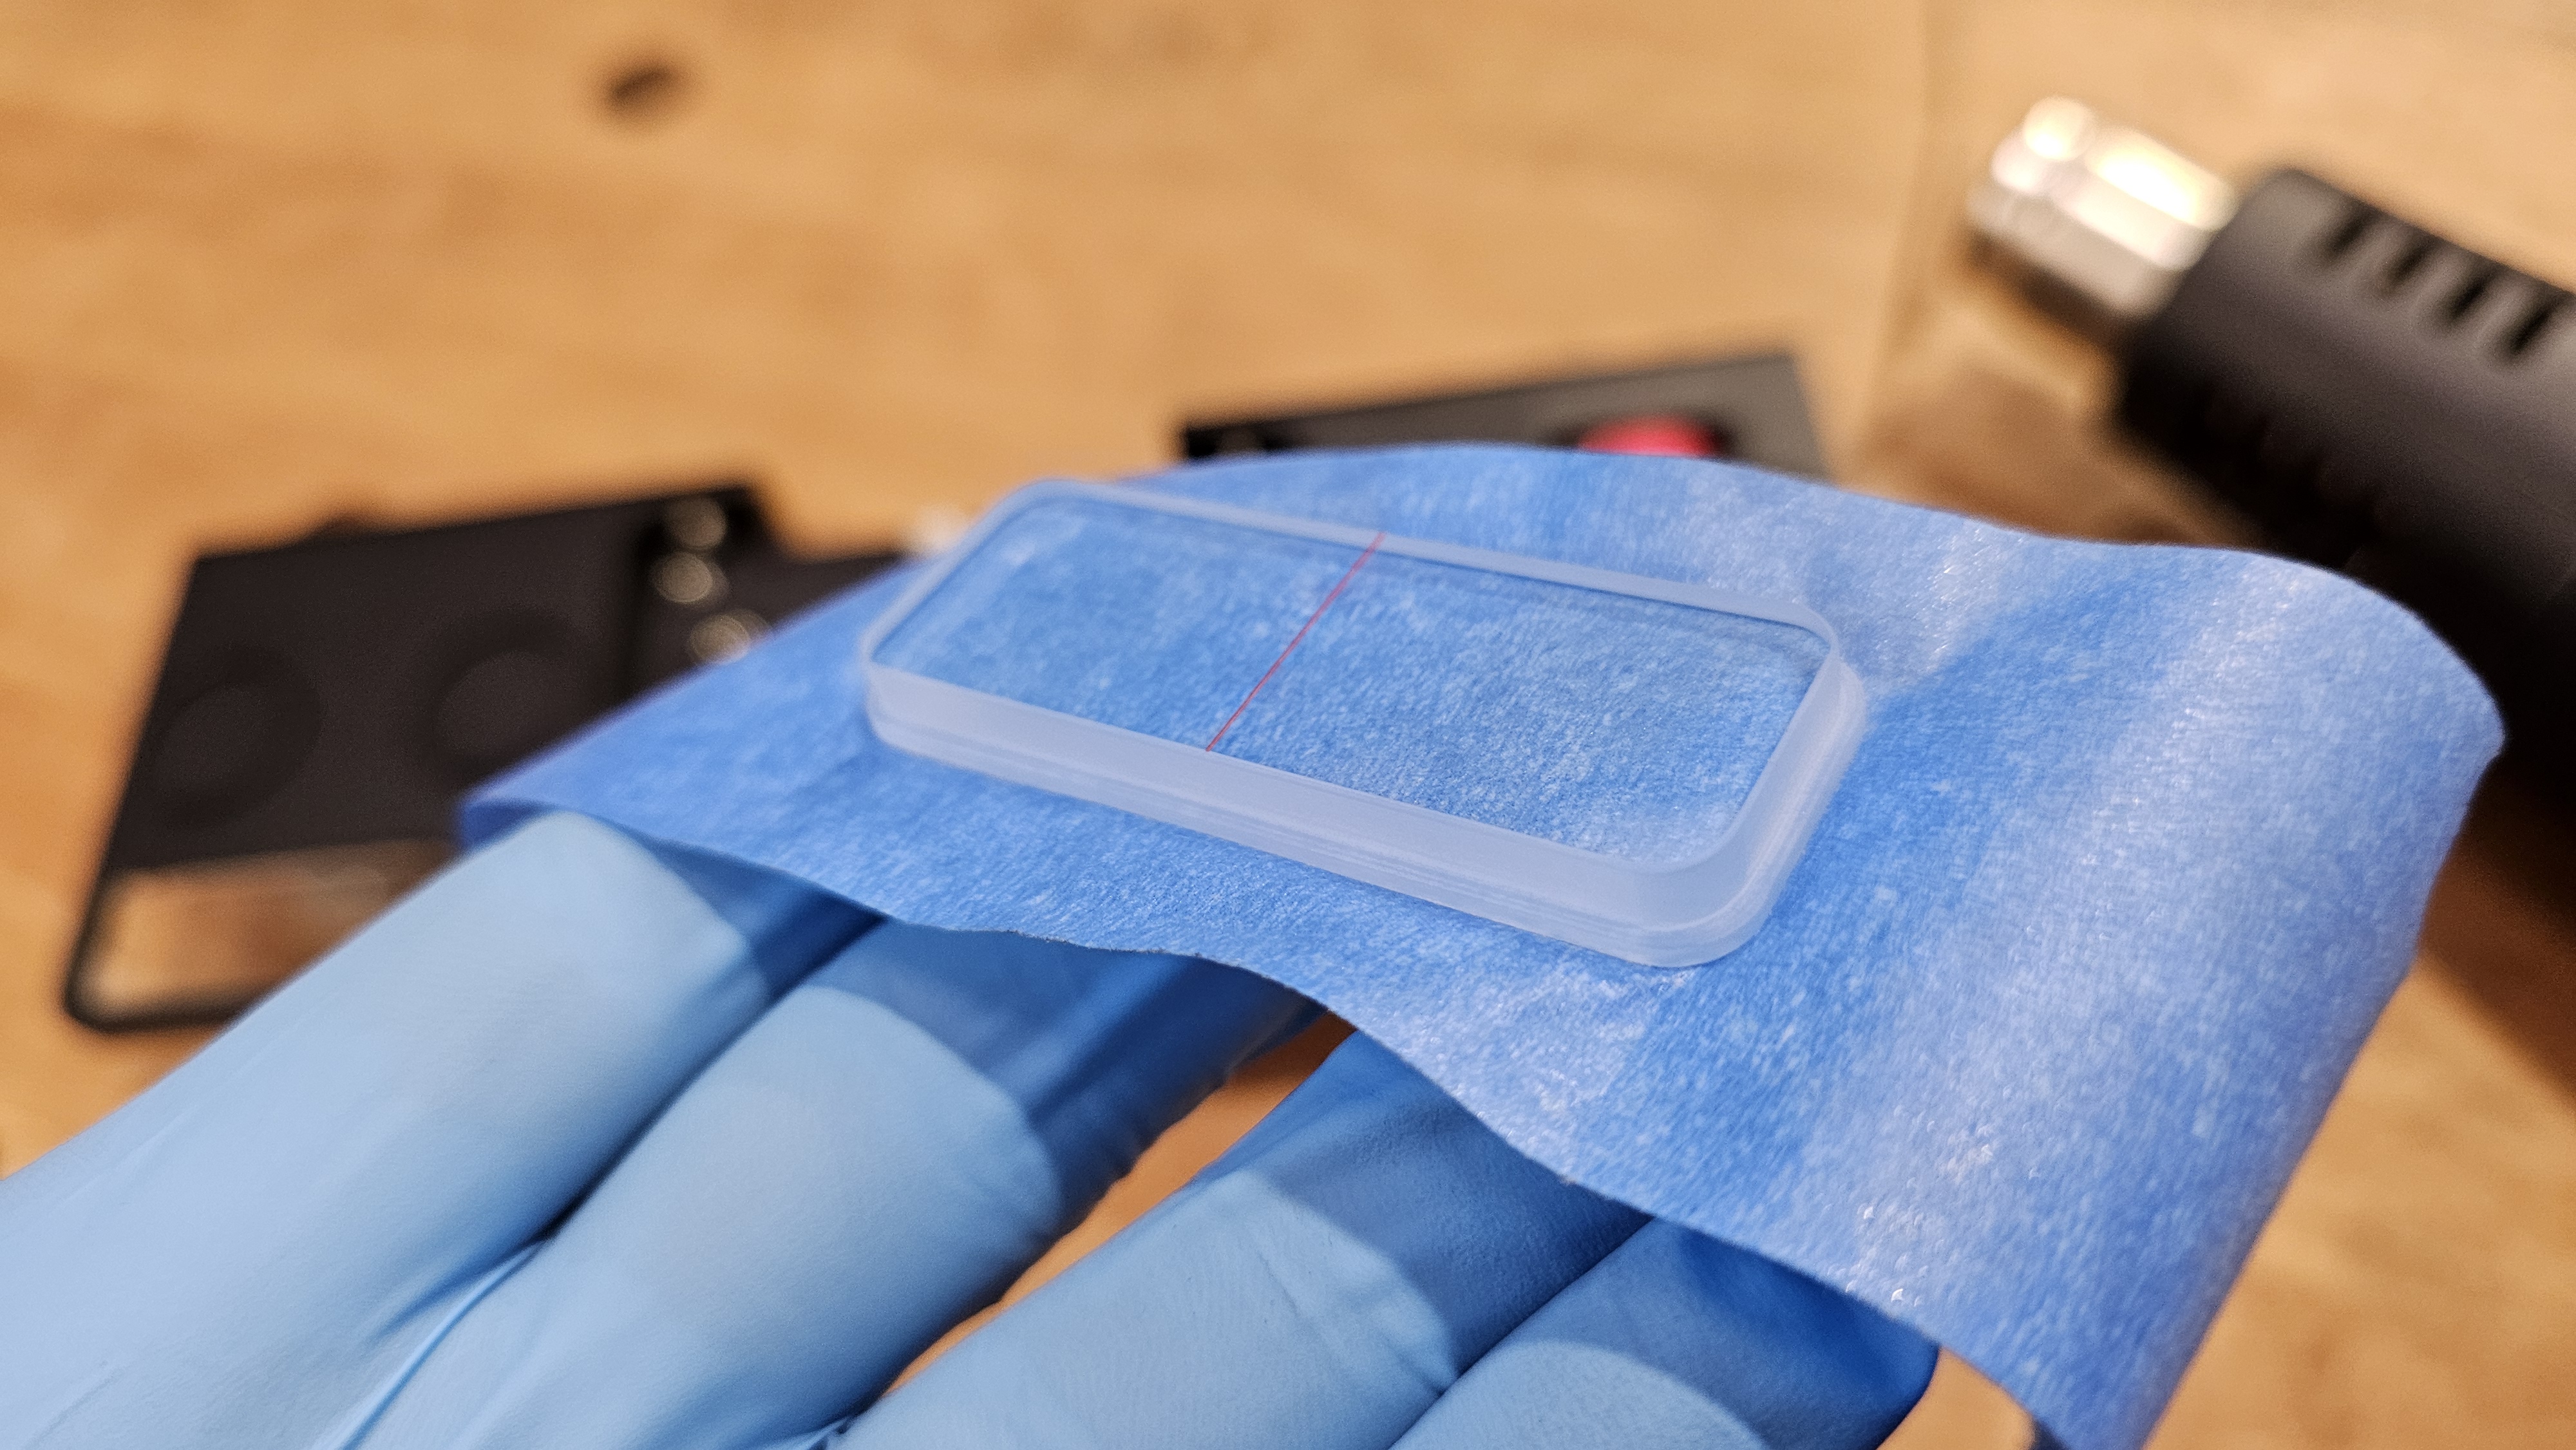
Prepare the New Viewer Using Blue Tape as a Carrier
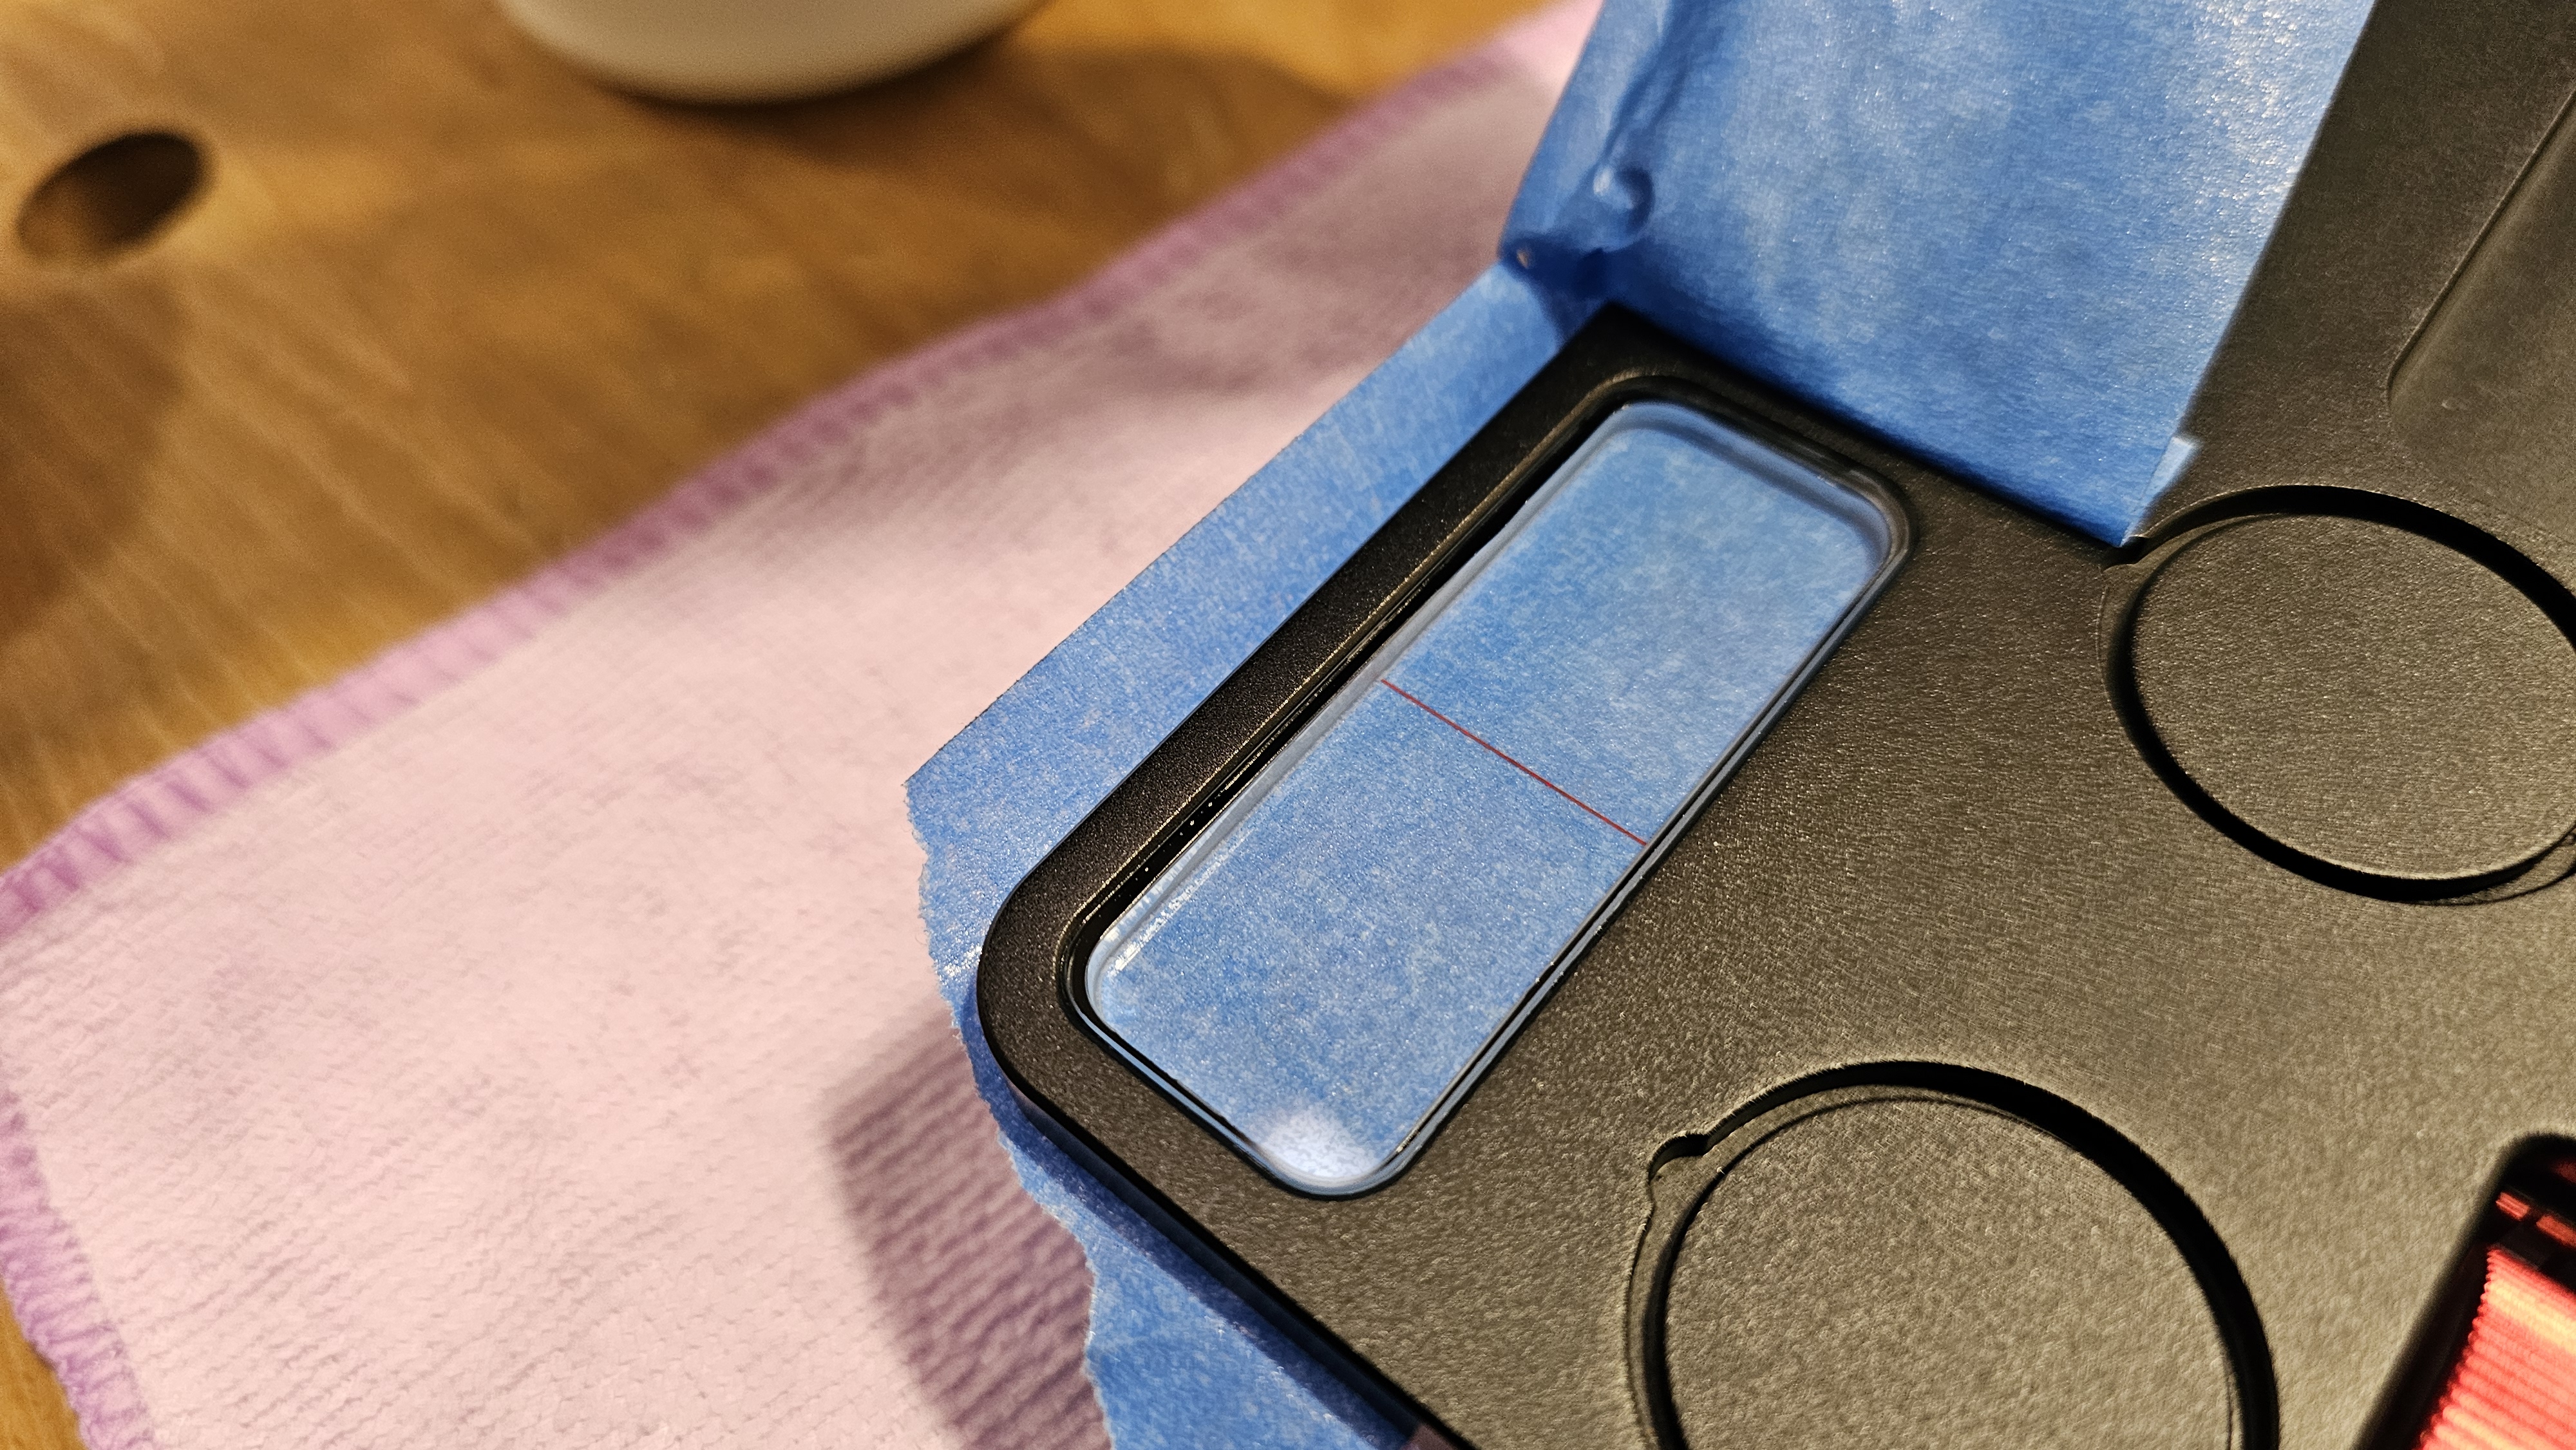
Place a strip of blue painter's tape on the top surface of the new replacement viewer. The tape acts as a clean carrier to lower the viewer into the socket without touching the optical surface with your fingers, preventing oils and smudges or UV resin from getting on the top surface.
Step 4 — New Viewer on Blue Tape Carrier
Step 4 — replacement viewer held on blue tape carrier, red hairline visible
5
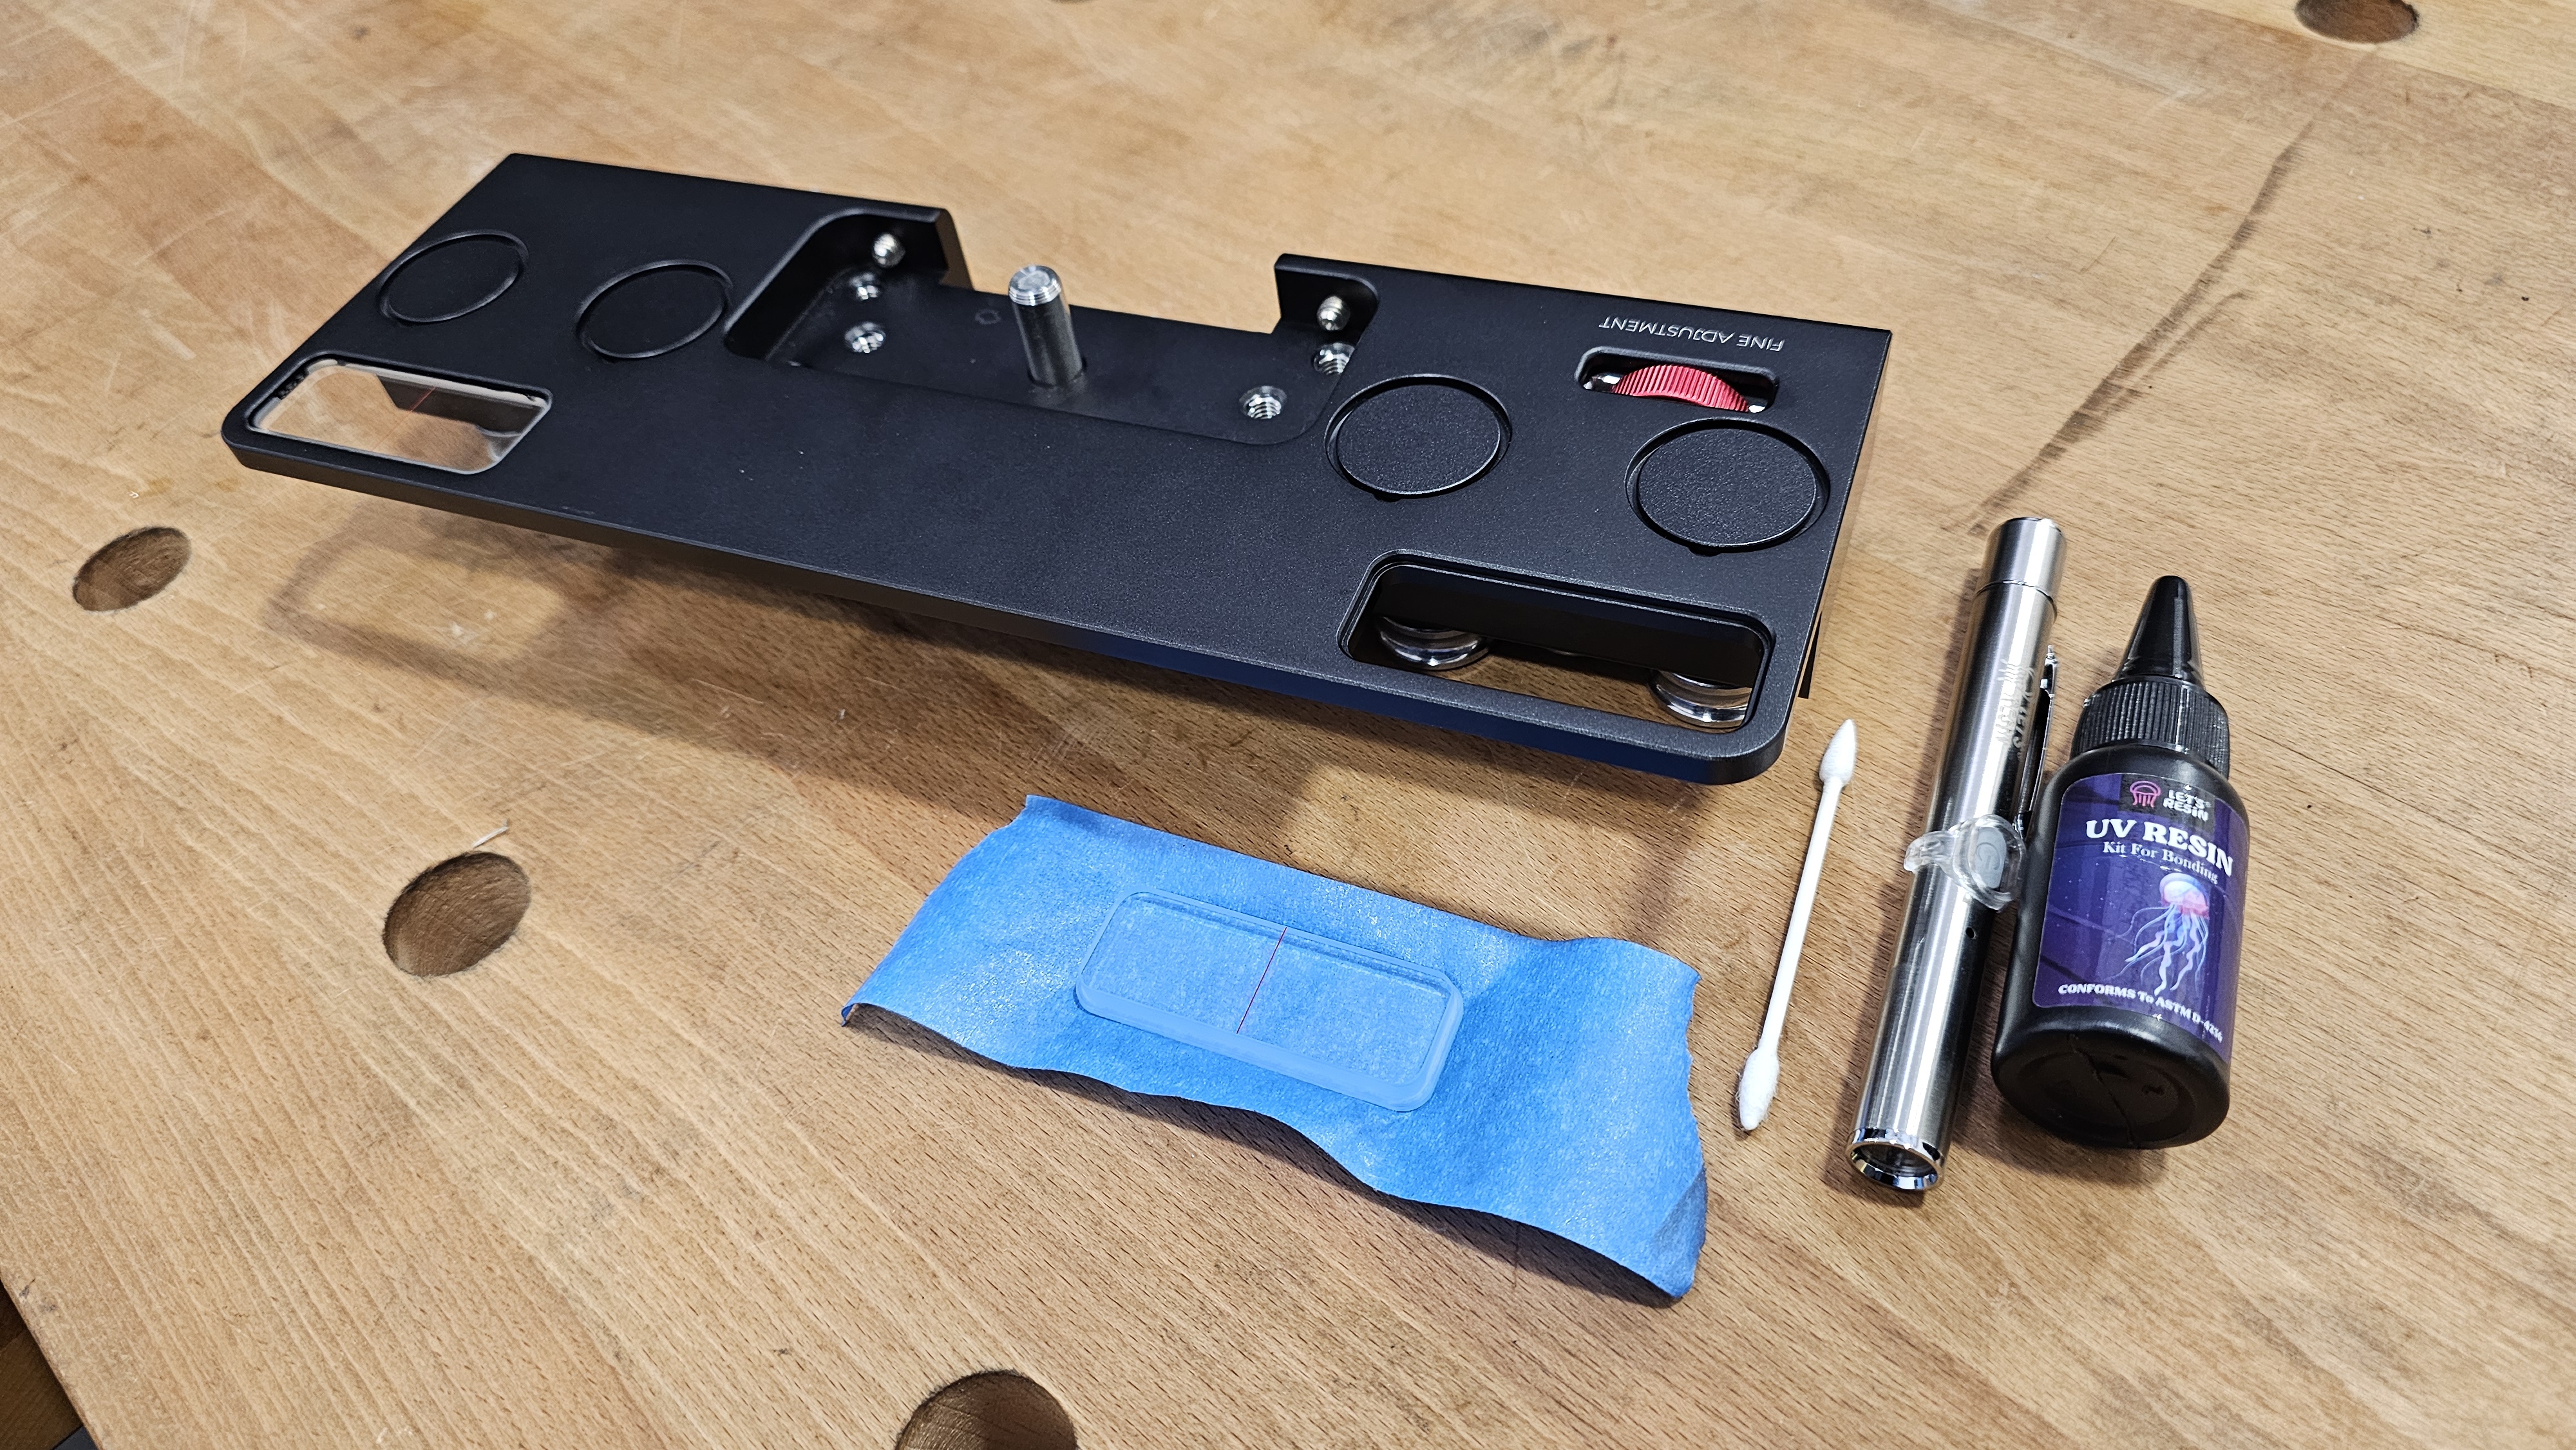
Stage Your Materials
Before applying any resin, set up your workspace with all materials within easy reach: the slider body, the viewer on its tape carrier, Q-tips, the UV resin bottle, and the UV curing pen. UV resin must be worked quickly once dispensed — having everything staged prevents it from curing prematurely.
Place the fence slider body face-up on a microfiber cloth to protect the surface and prevent it from sliding.
Step 5 — Materials Staged and Ready
Step 5 — slider body with viewer on tape, UV resin, UV light pen and Q-tip all staged
6
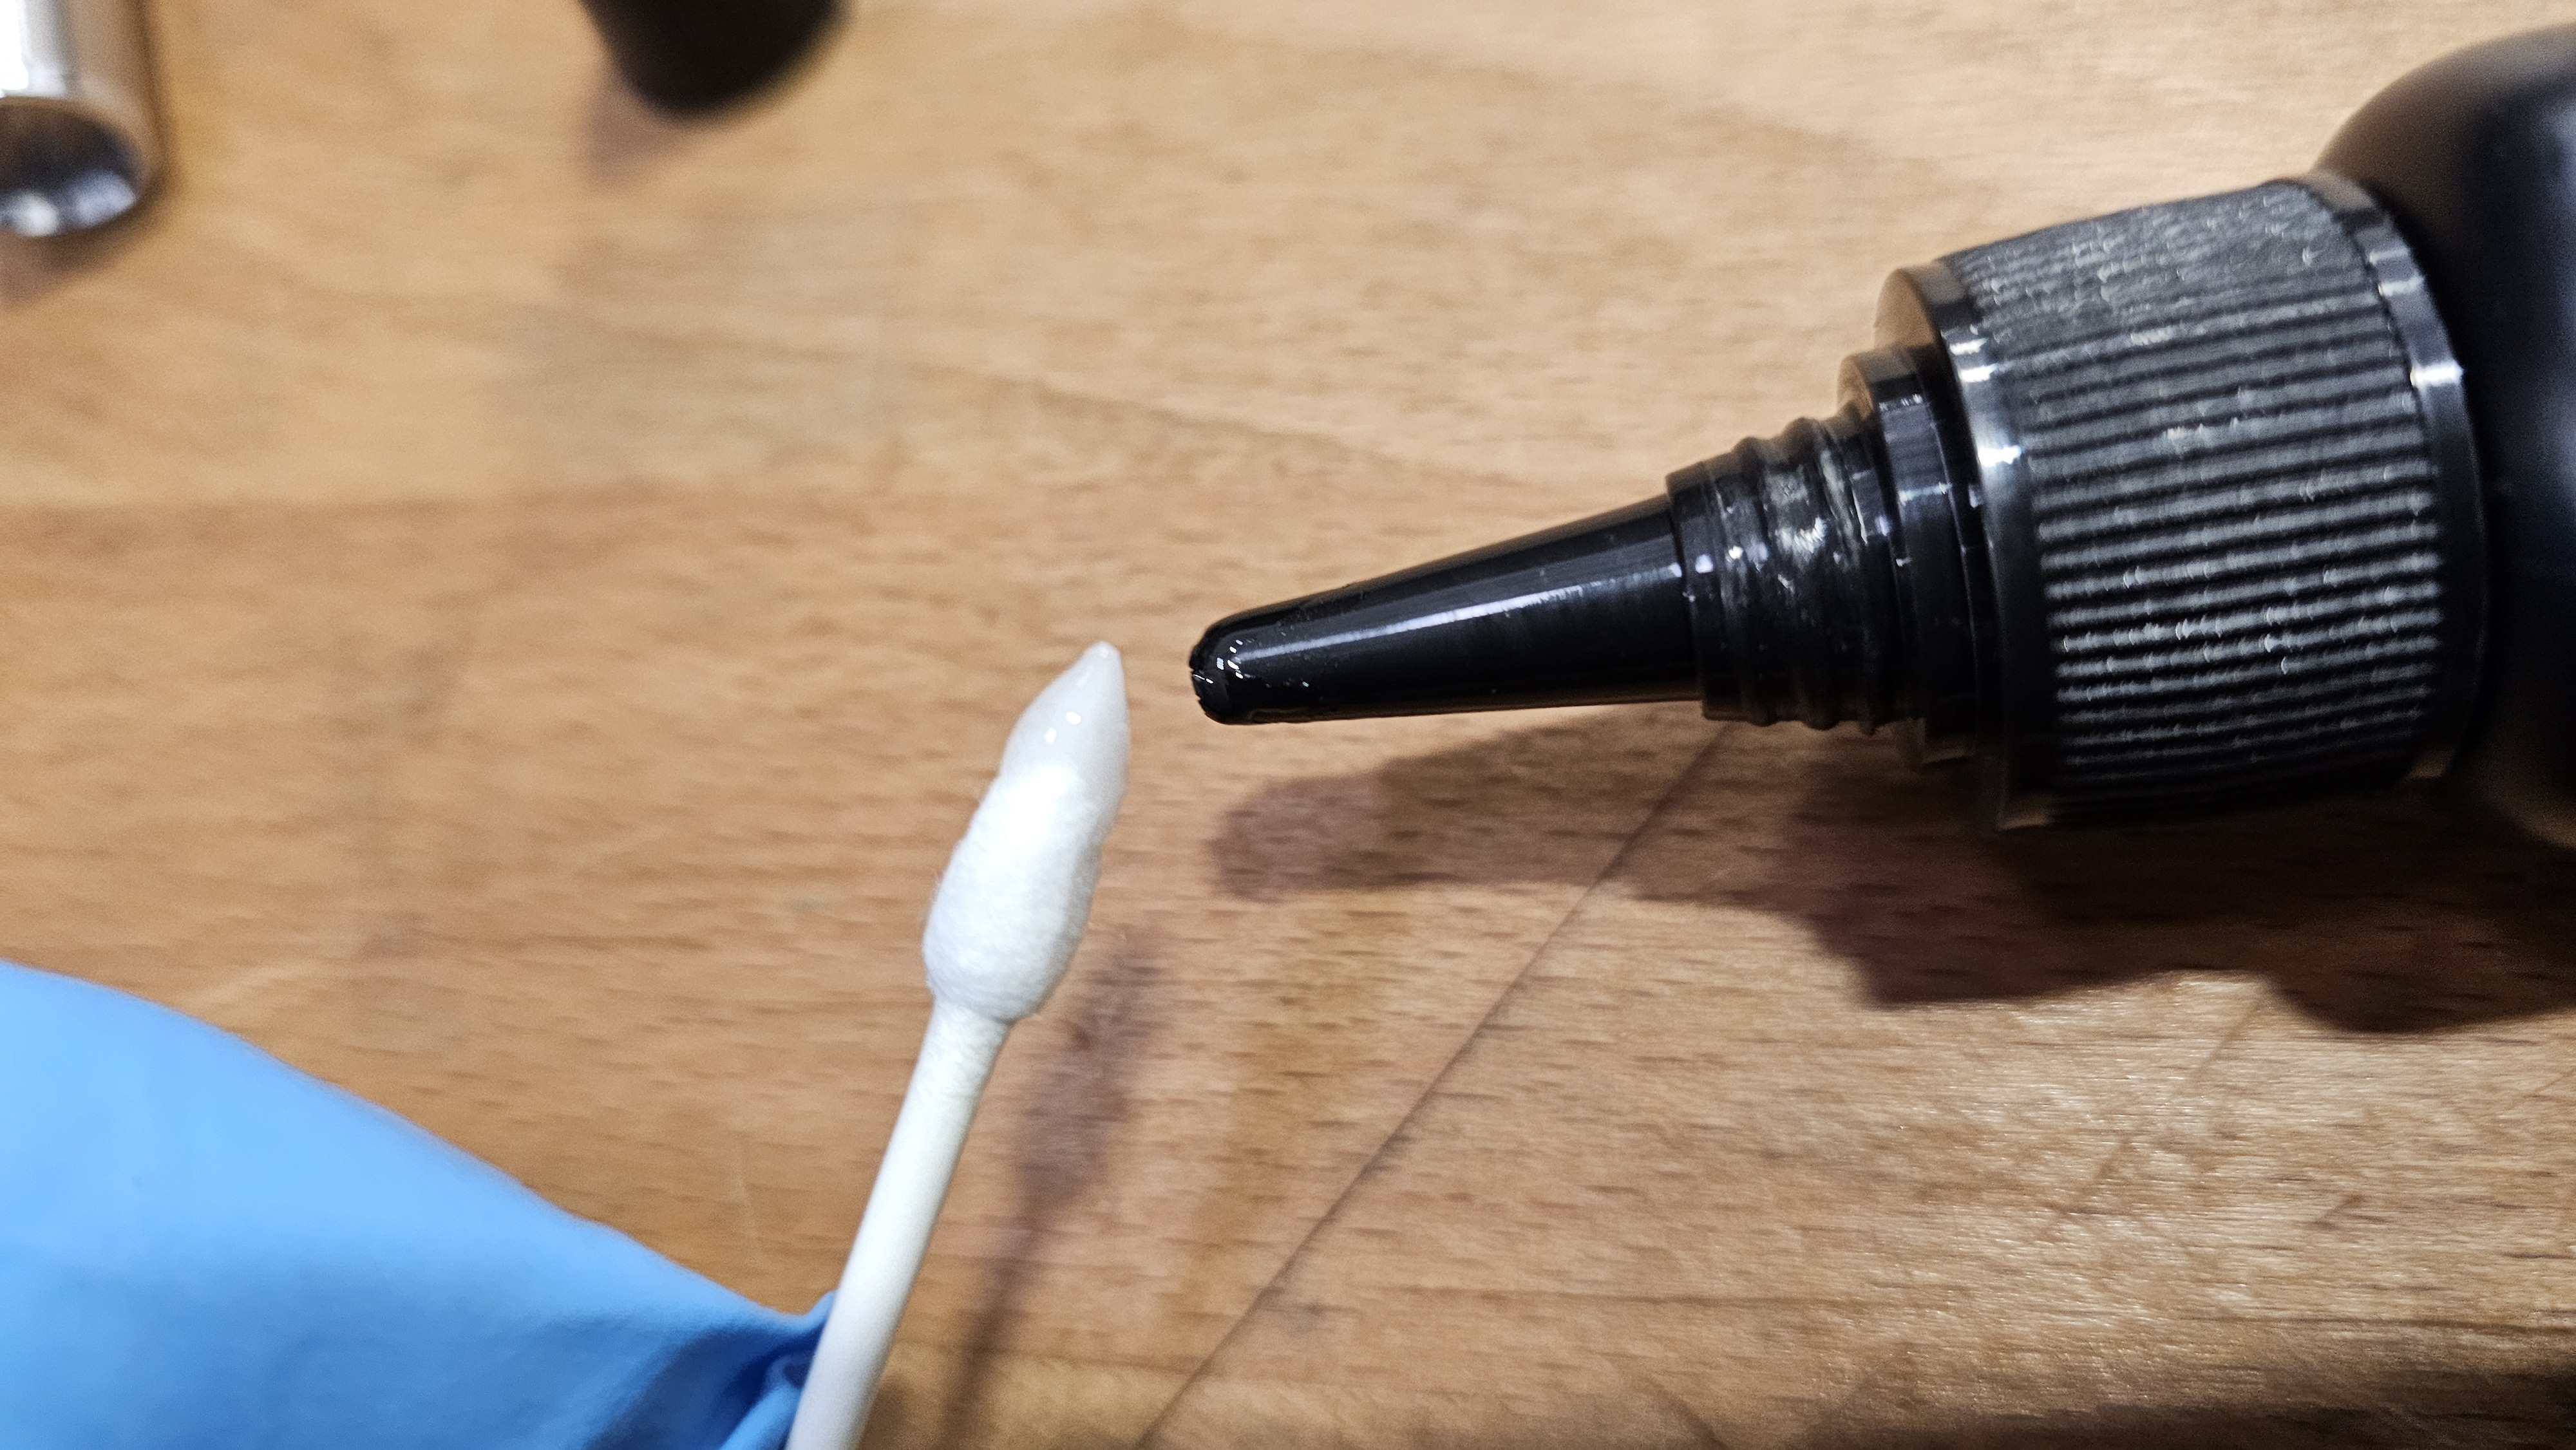
Apply a Drop of UV Resin to a Q-Tip
Dispense a small drop of UV resin onto the tip of a cotton Q-tip. You only need a small amount — the resin is applied in a thin layer and too much will squeeze out and create a messy excess that's difficult to remove after curing.
Step 6 — Load Q-Tip with UV Resin
Step 6 — UV resin bottle dispensing a drop onto a cotton Q-tip swab
7
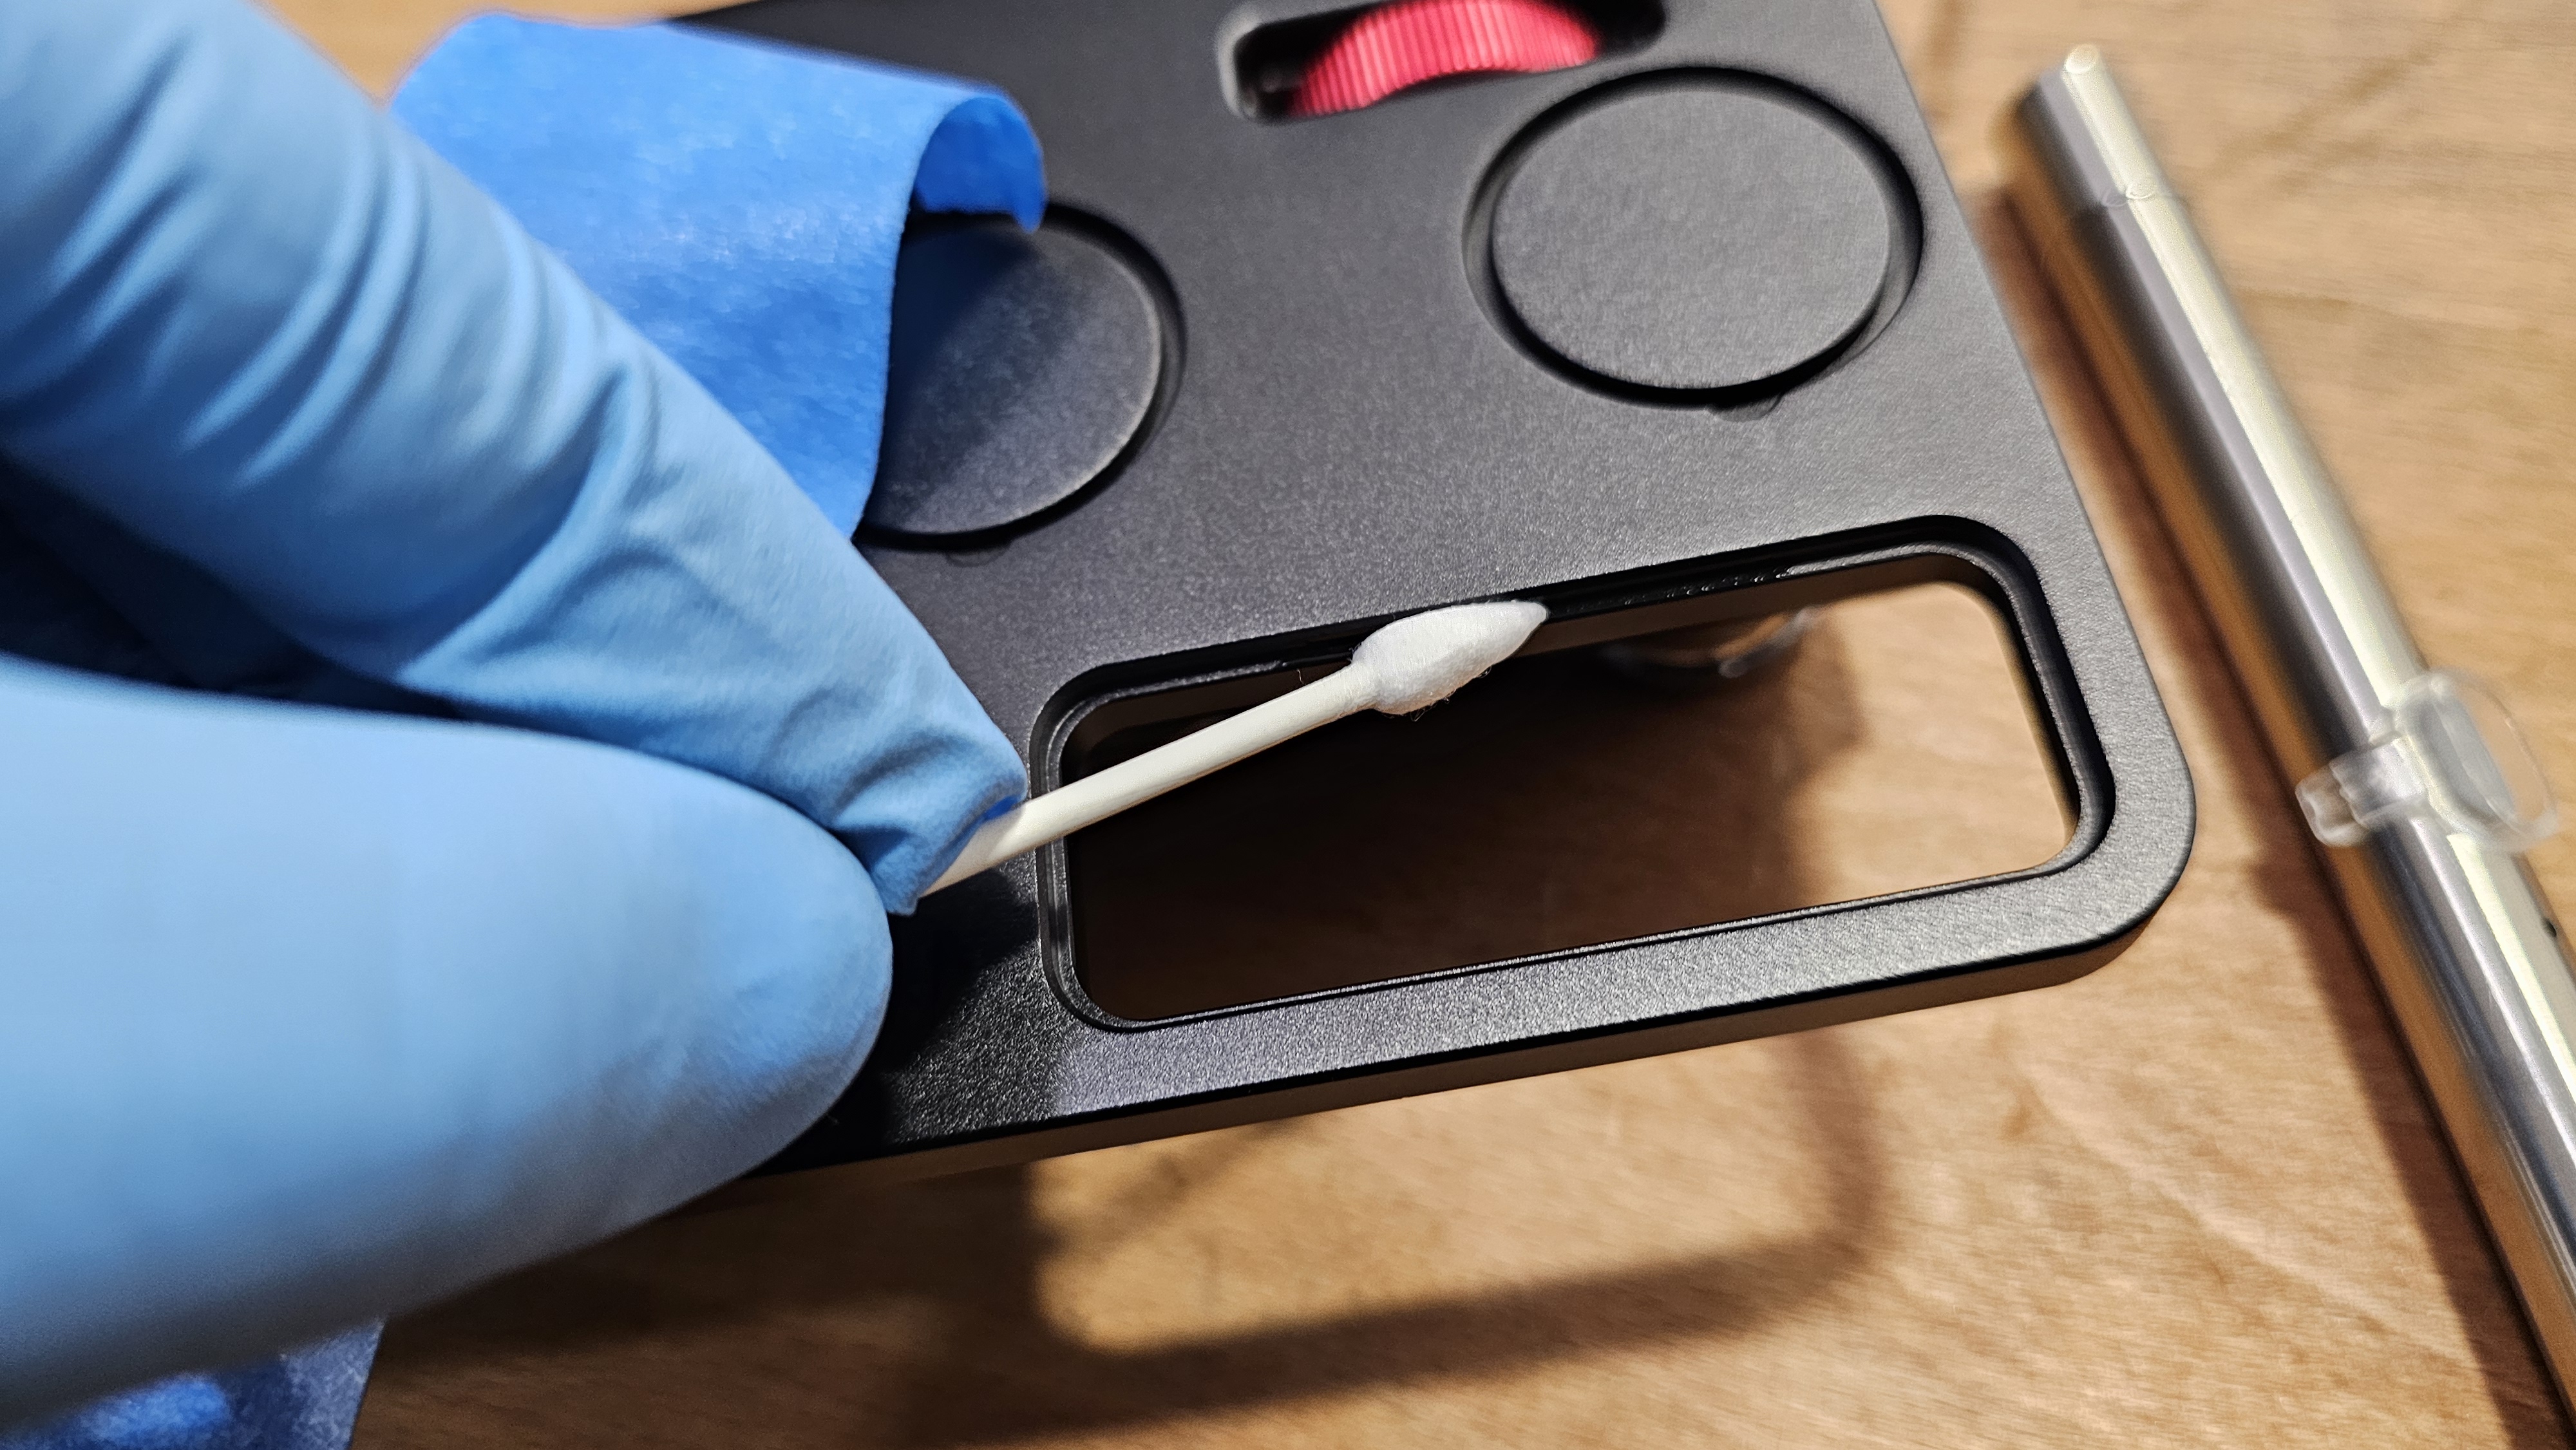
Apply UV Resin to the Inner Edge of the Socket
Using the loaded Q-tip, apply a thin, even layer of UV resin only to the inner wall/edge of the viewer socket — the recessed rim that the viewer will sit against. Work around the full perimeter of the socket.
Do not apply resin to the flat bottom of the socket — resin there will create a visible cloudy layer under the viewer. Apply only to the vertical walls/rim.
Step 7 — Apply Resin to Inner Edge of Socket Only
Step 7 — Q-tip applying UV resin to inner edge of empty viewer socket
8
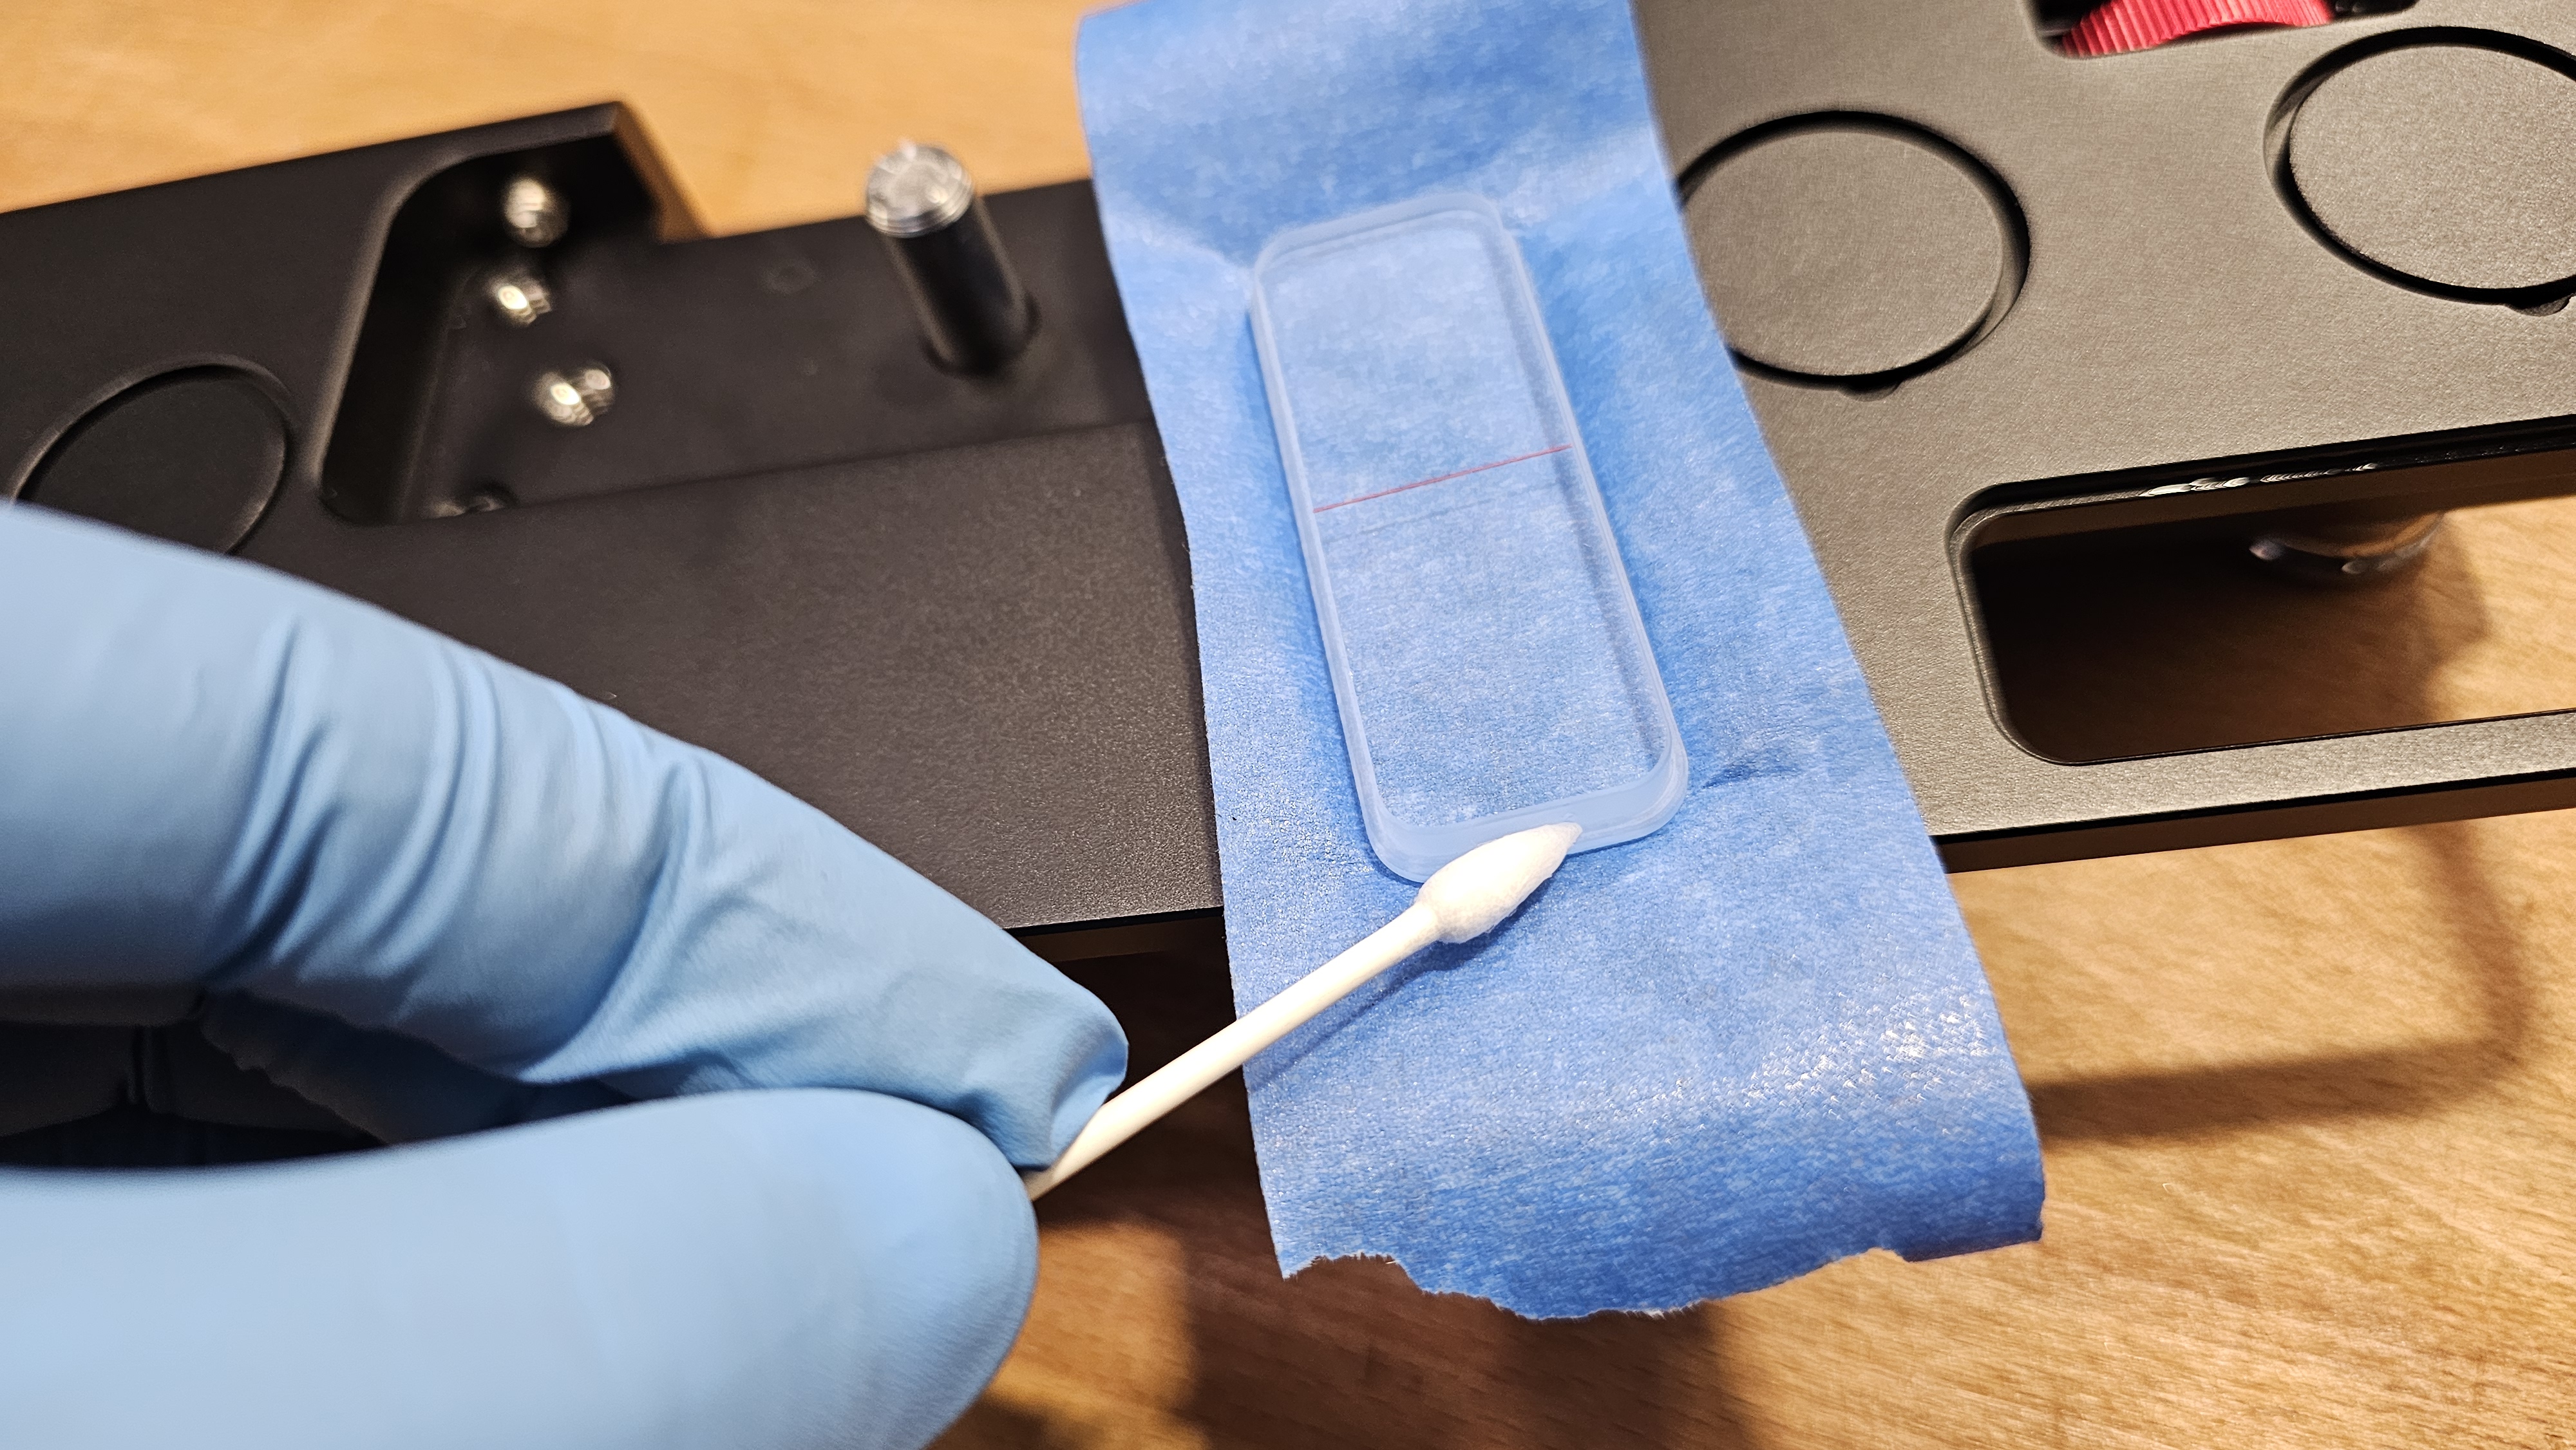
Seat the Viewer and Apply a Thin Layer to the Outer Edge
Using the blue tape as a handle, lower the new viewer into the socket, hairline side facing up. Press it gently into place so it sits flush and level in the socket. The tape prevents your fingers from touching the optical surface.
Using a fresh Q-tip loaded with a small amount of resin, apply a thin layer around the outer seam — the gap between the outer edge of the viewer and the socket wall. This creates the seal that locks the viewer in place.
Less is more — a thin bead is sufficient. Excess resin along the top edge can be addressed in the optional touch-up steps below.
Step 8 — Apply Resin to Outer Edge of Seated Viewer
Step 8 — Q-tip applying thin UV resin layer to the outer seam of the viewer now seated in socket
9
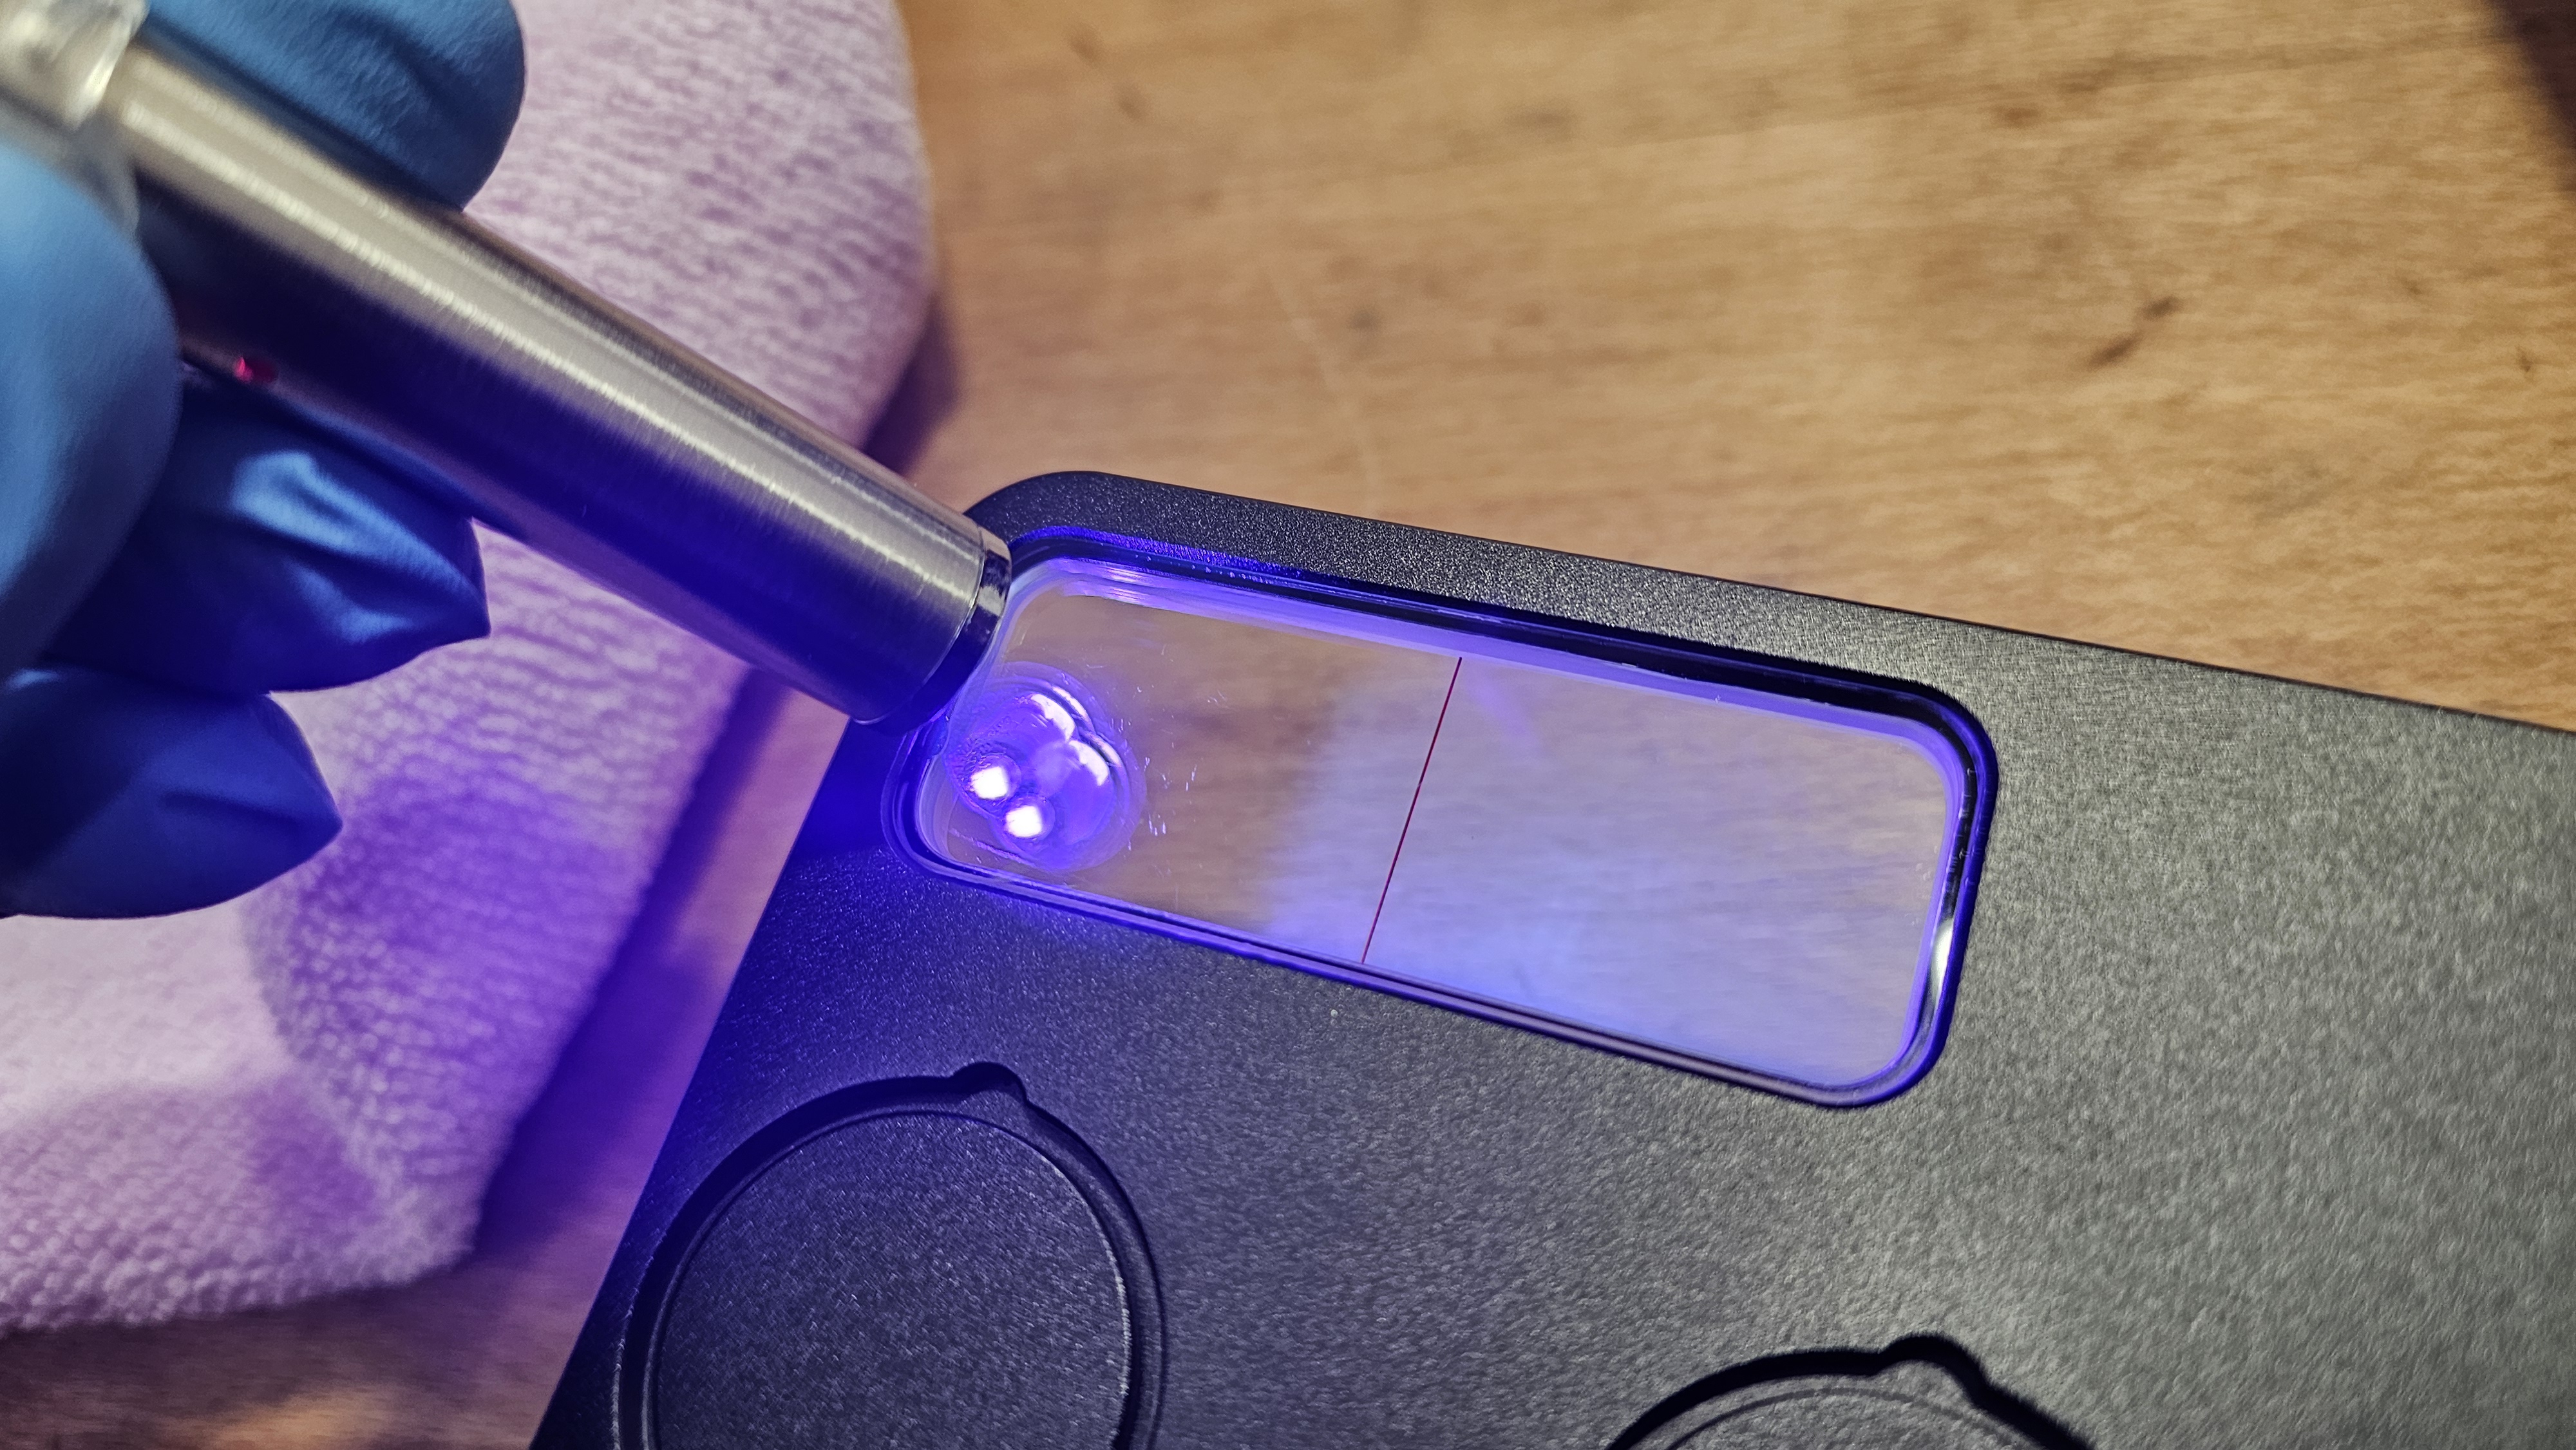
Cure the Resin with the UV Curing Light
Do not look directly at the UV light. Point it at the resin seam around the viewer and hold in place for the cure time recommended by your resin's instructions — typically 30–60 seconds per section for a pen-style UV light.
Work around the full perimeter of the viewer seam, curing each section. The resin will change from glossy and fluid to a hard, clear bond when fully cured.
The blue tape on the top of the viewer can remain in place during this cure — it does not need to be removed first.
Step 9 — Cure Resin with UV Curing Light
Step 9 — UV pen light curing resin seam around viewer, blue-purple UV light visible at edges
Viewer Installed — Remove Tape and Inspect
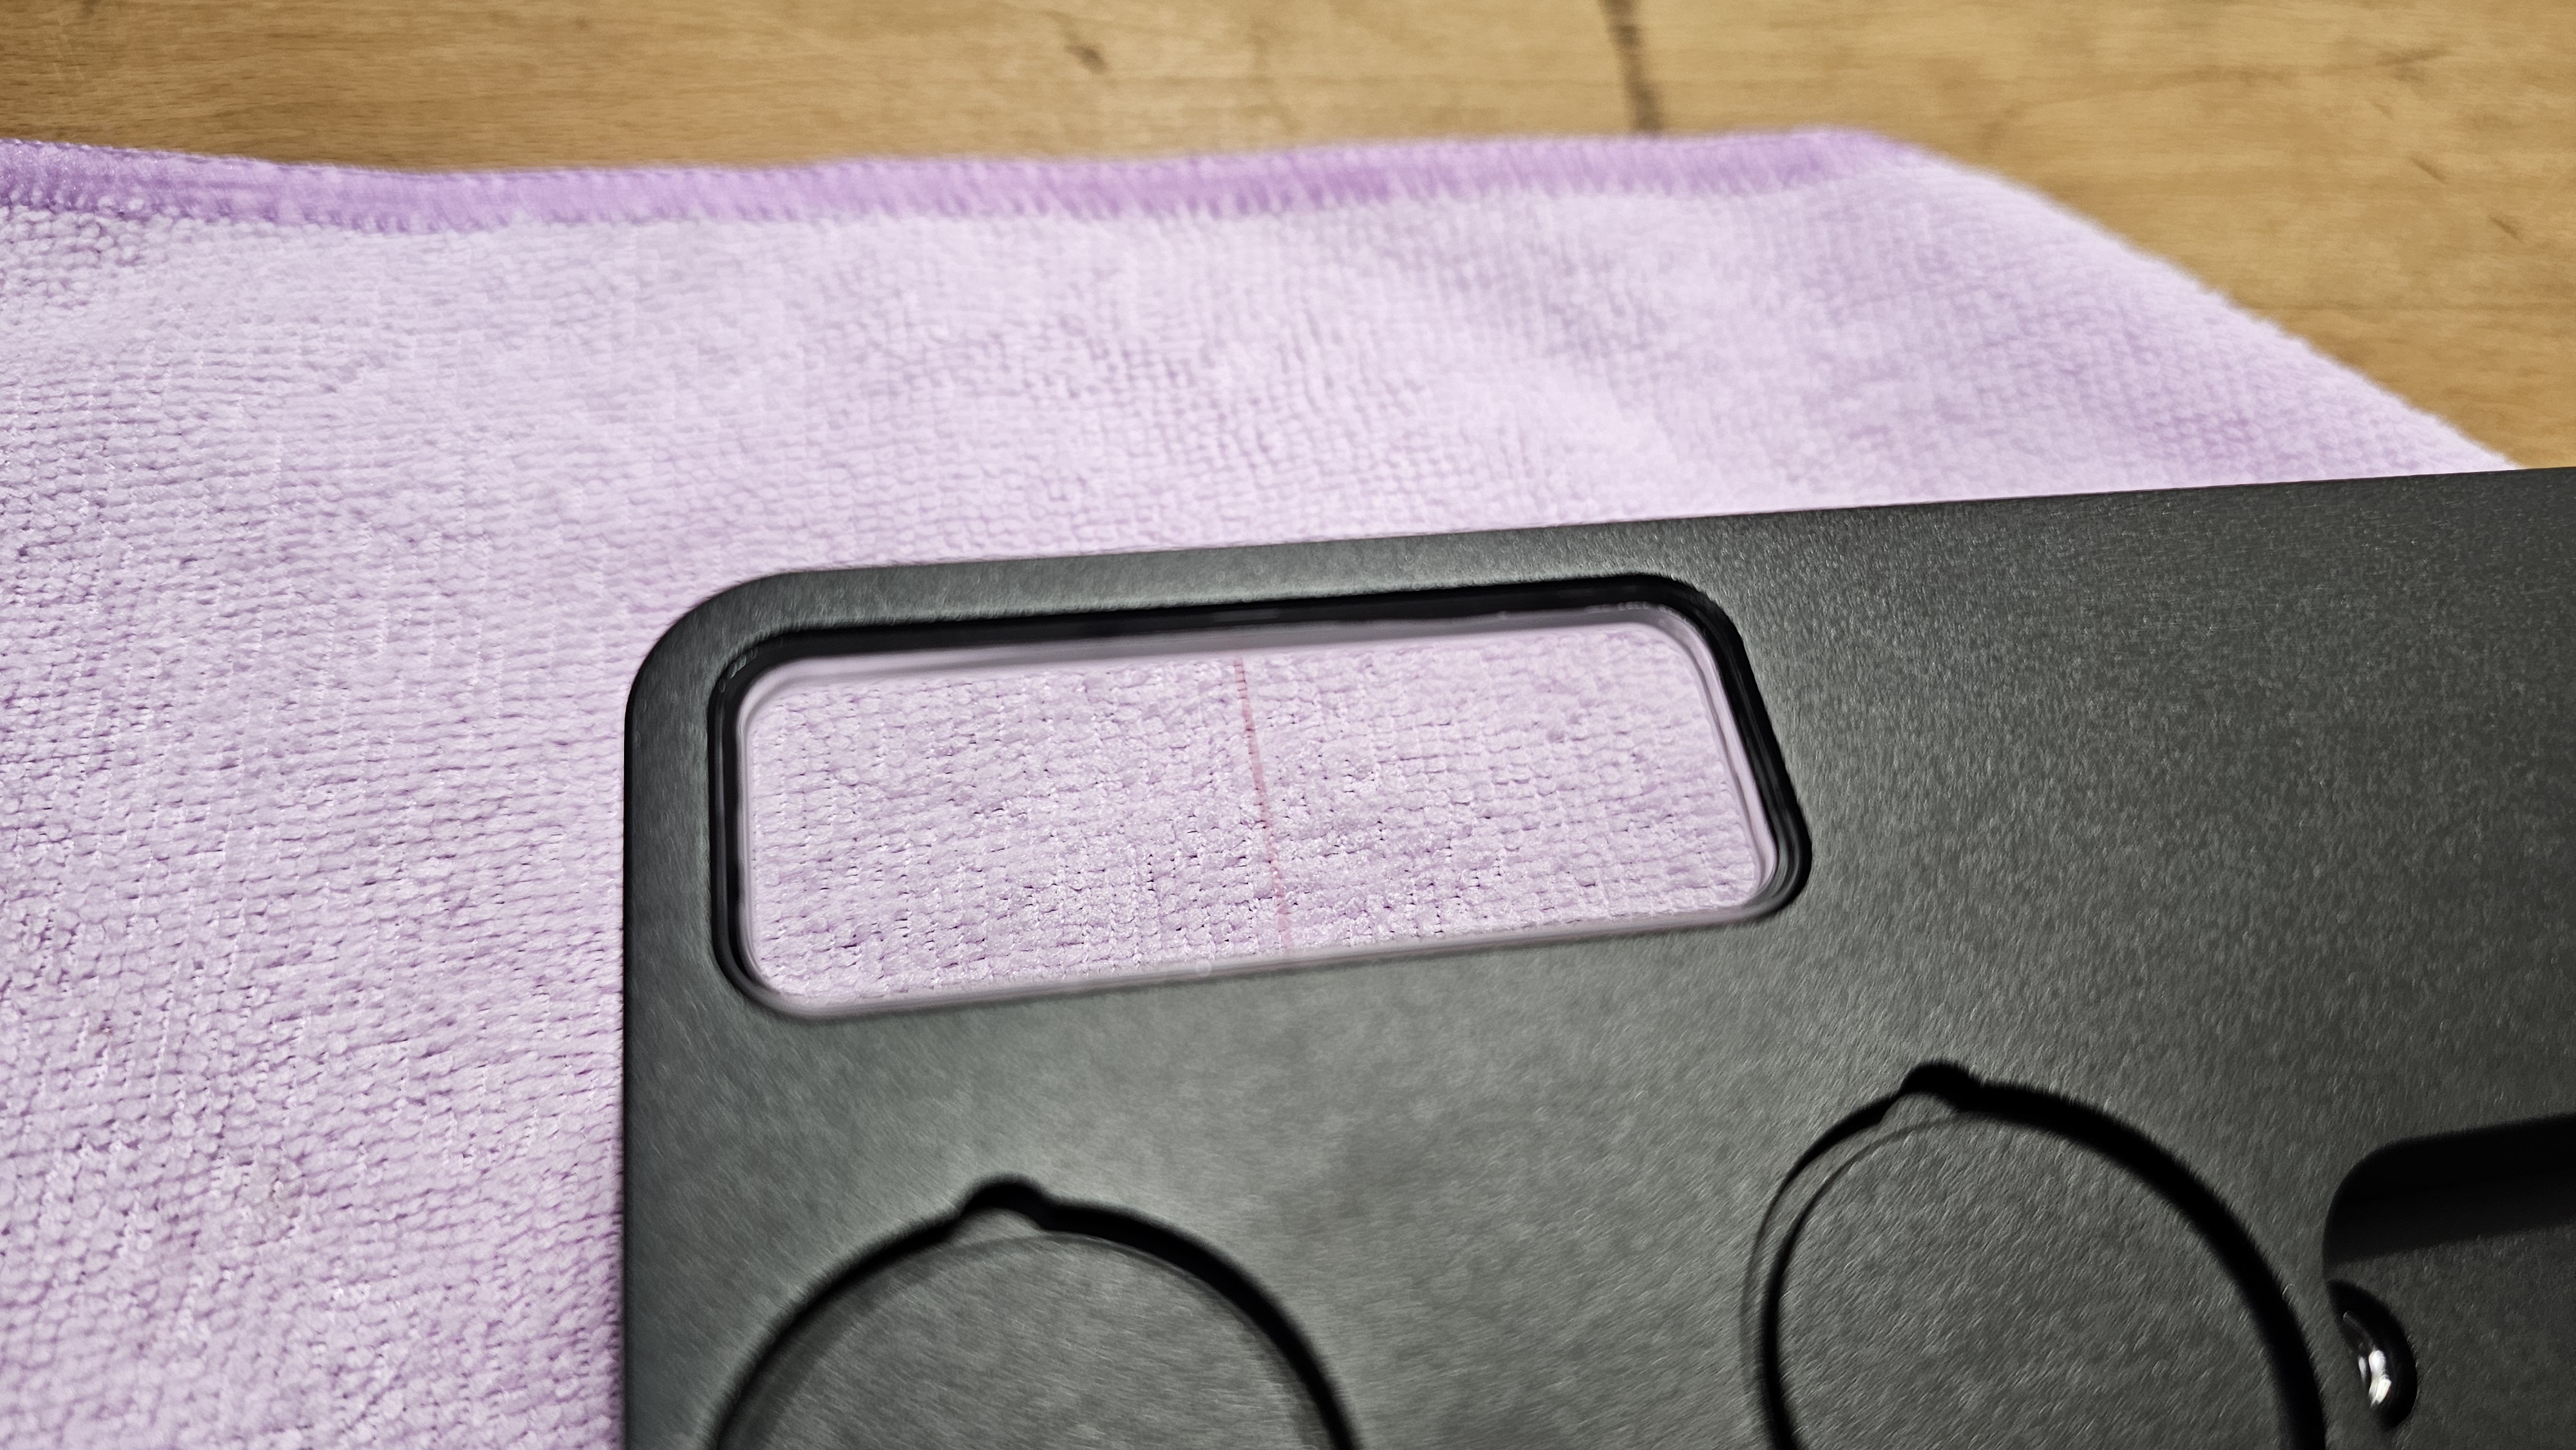
Once the resin is fully cured, carefully peel the blue tape carrier from the top surface of the viewer. The viewer should be firmly bonded in the socket, flush, clear, and clean.
Inspect the edges for any gaps, cloudiness, or missed spots in the resin seal. If the bond looks complete and the viewer is secure, the installation is done. If touch-ups are needed along the edges, proceed to the optional section below.
Result — Viewer Successfully Installed
Step 10 — completed viewer installation, clear lens with red hairline seated flush in socket
Optional — Edge Touch-Up (If Needed)
Only required if gaps or thin spots remain along the top or bottom edges of the viewer after the initial cure.
A
Mask the Sides with Tape to Contain Resin
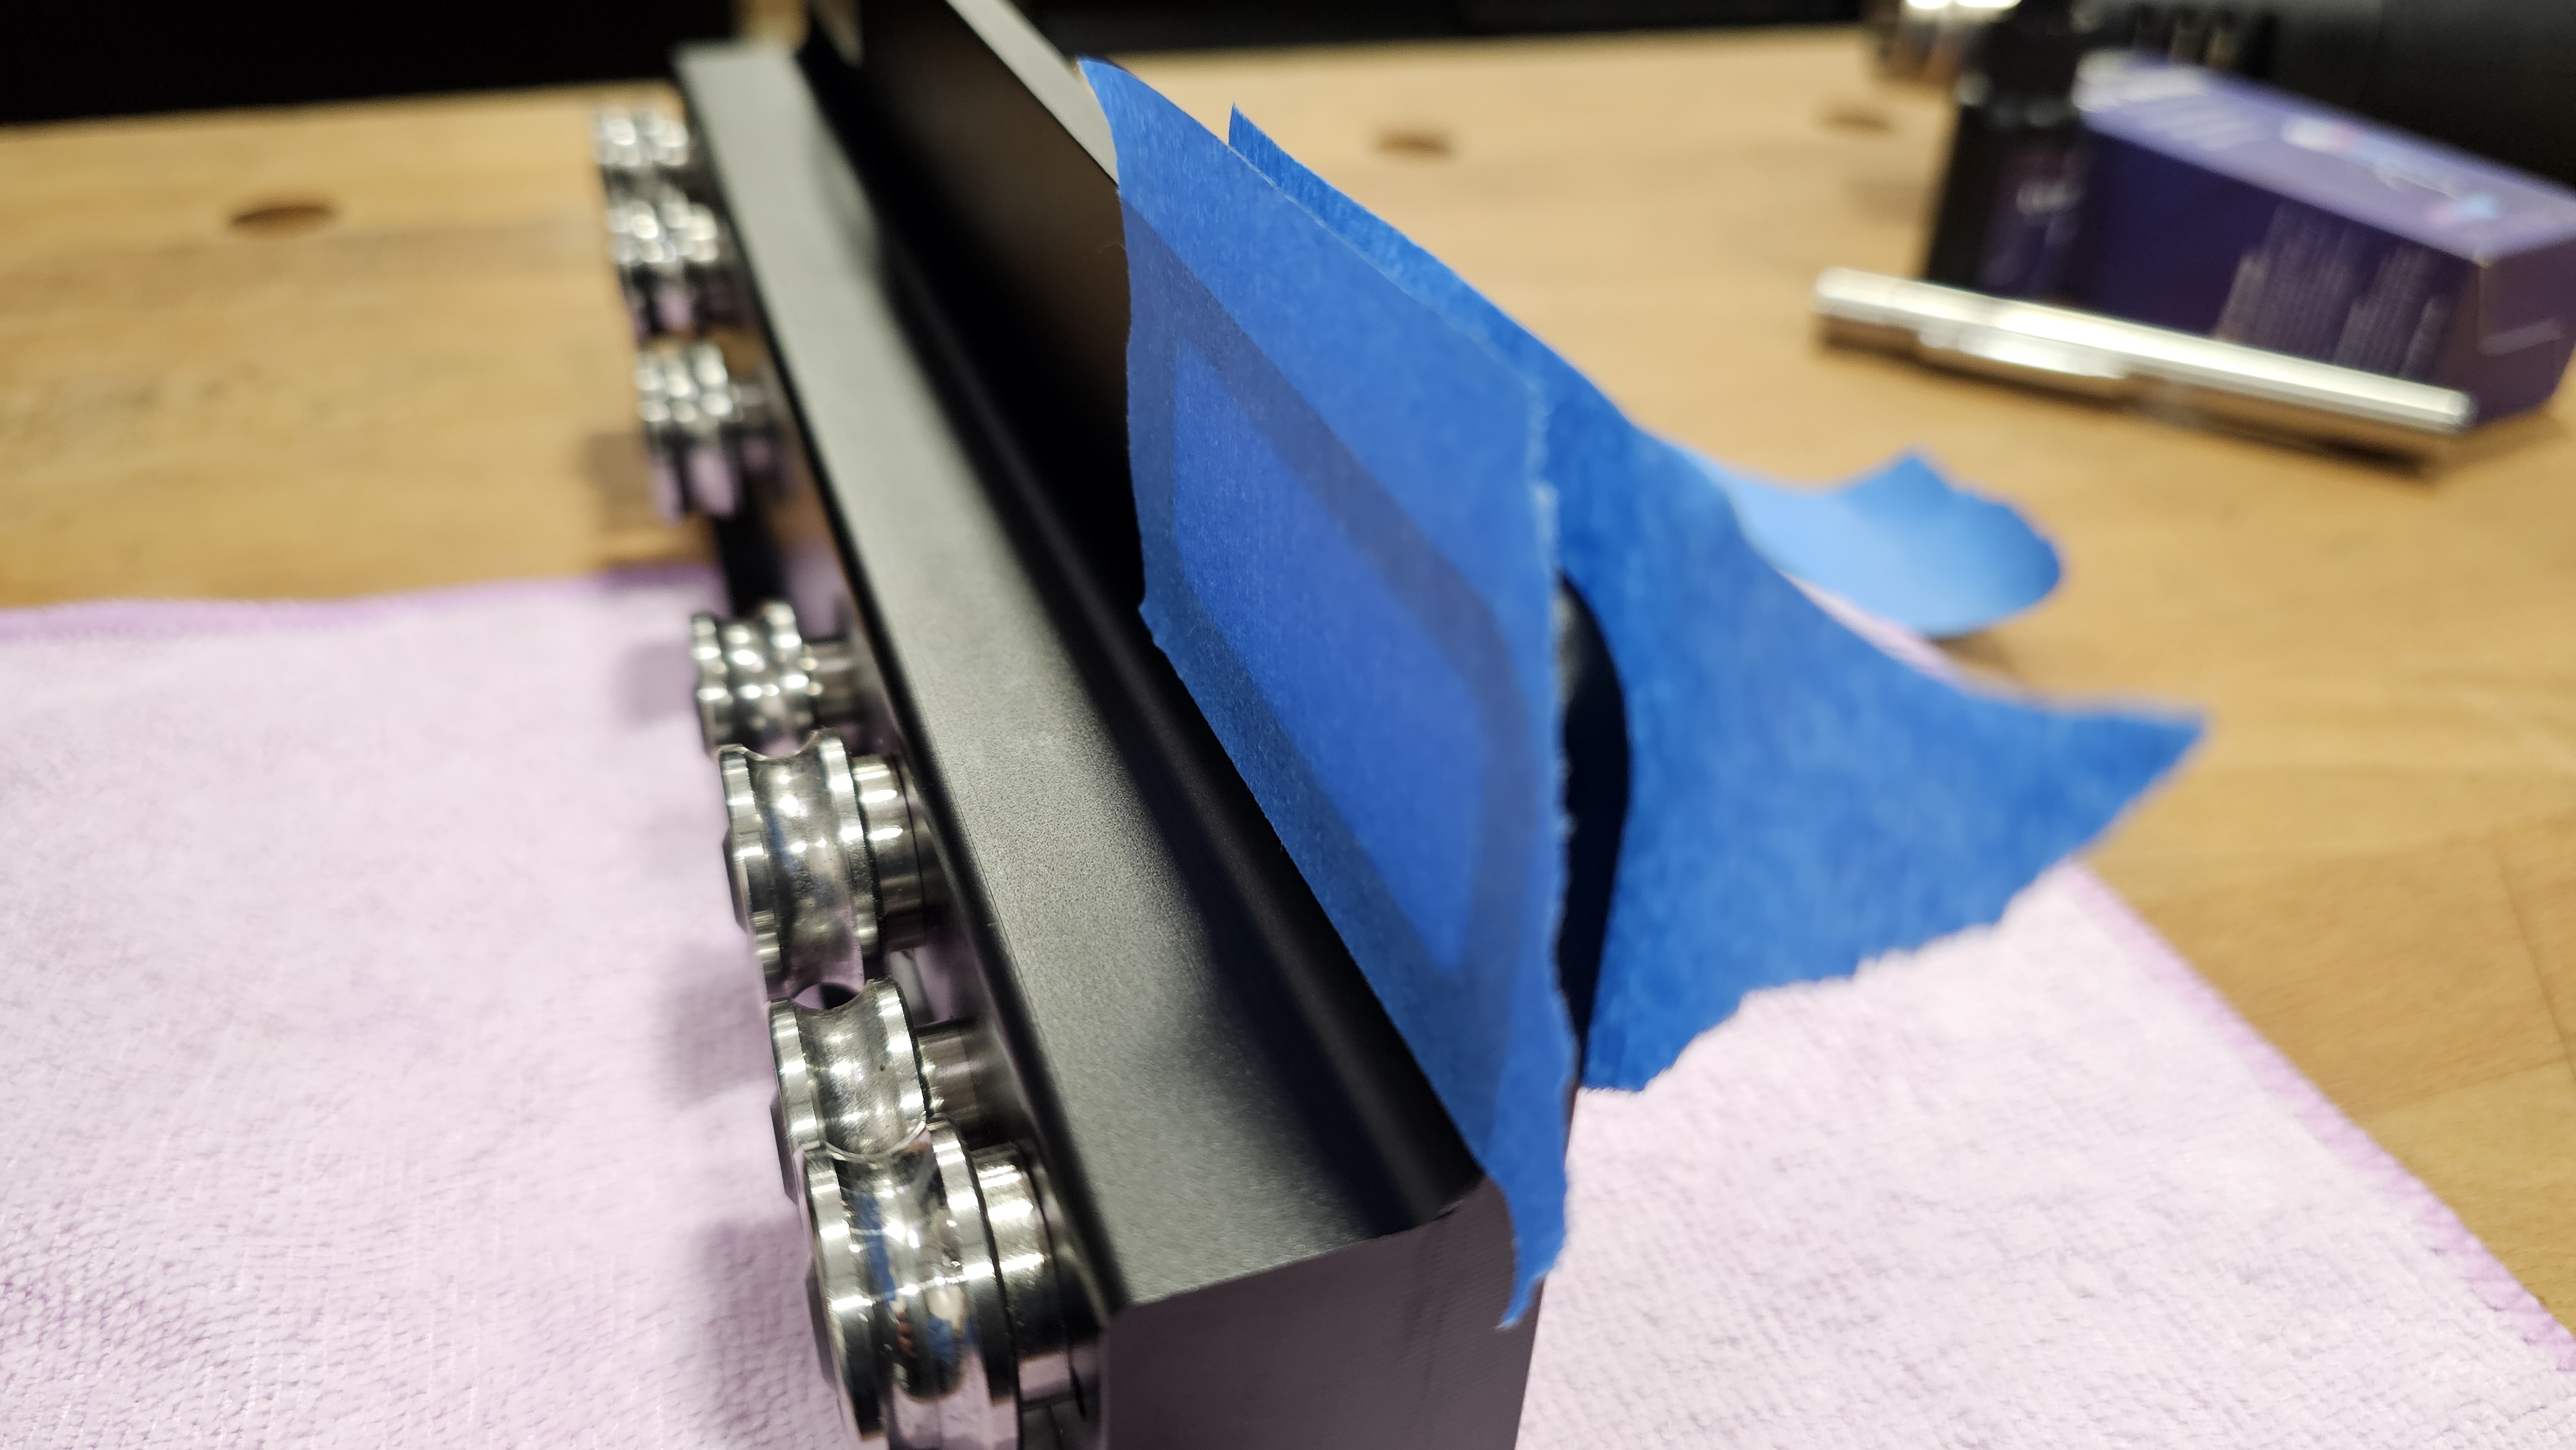
Apply strips of blue painter's tape along the top and/or bottom faces of the fence body — spanning across the viewer socket. This creates a barrier that holds additional resin in the edge gap while it's applied from the underside, preventing it from running out.
Touch-Up A — Tape Applied to Sides for Edge Filling
Touch-up A — blue masking tape applied to the sides of the fence body across the viewer socket opening to contain resin
B
Fill Edges from the Underside, Then Remove Top Tape
Flip the fence slider over and use a Q-tip loaded with UV resin to work additional resin into any gaps along the viewer edges from the underside of the socket. The tape on the top face prevents overflow and keeps the top surface clean.
After filling the edges from the underside, flip back over and remove the top tape before curing — this allows the UV light to reach the full seam from above.
Touch-Up B — Remove Top Tape Before Final Cure
Touch-up B — top layer of blue tape being peeled back from viewer socket after filling from underside
Cure and Remove All Tape to Finish
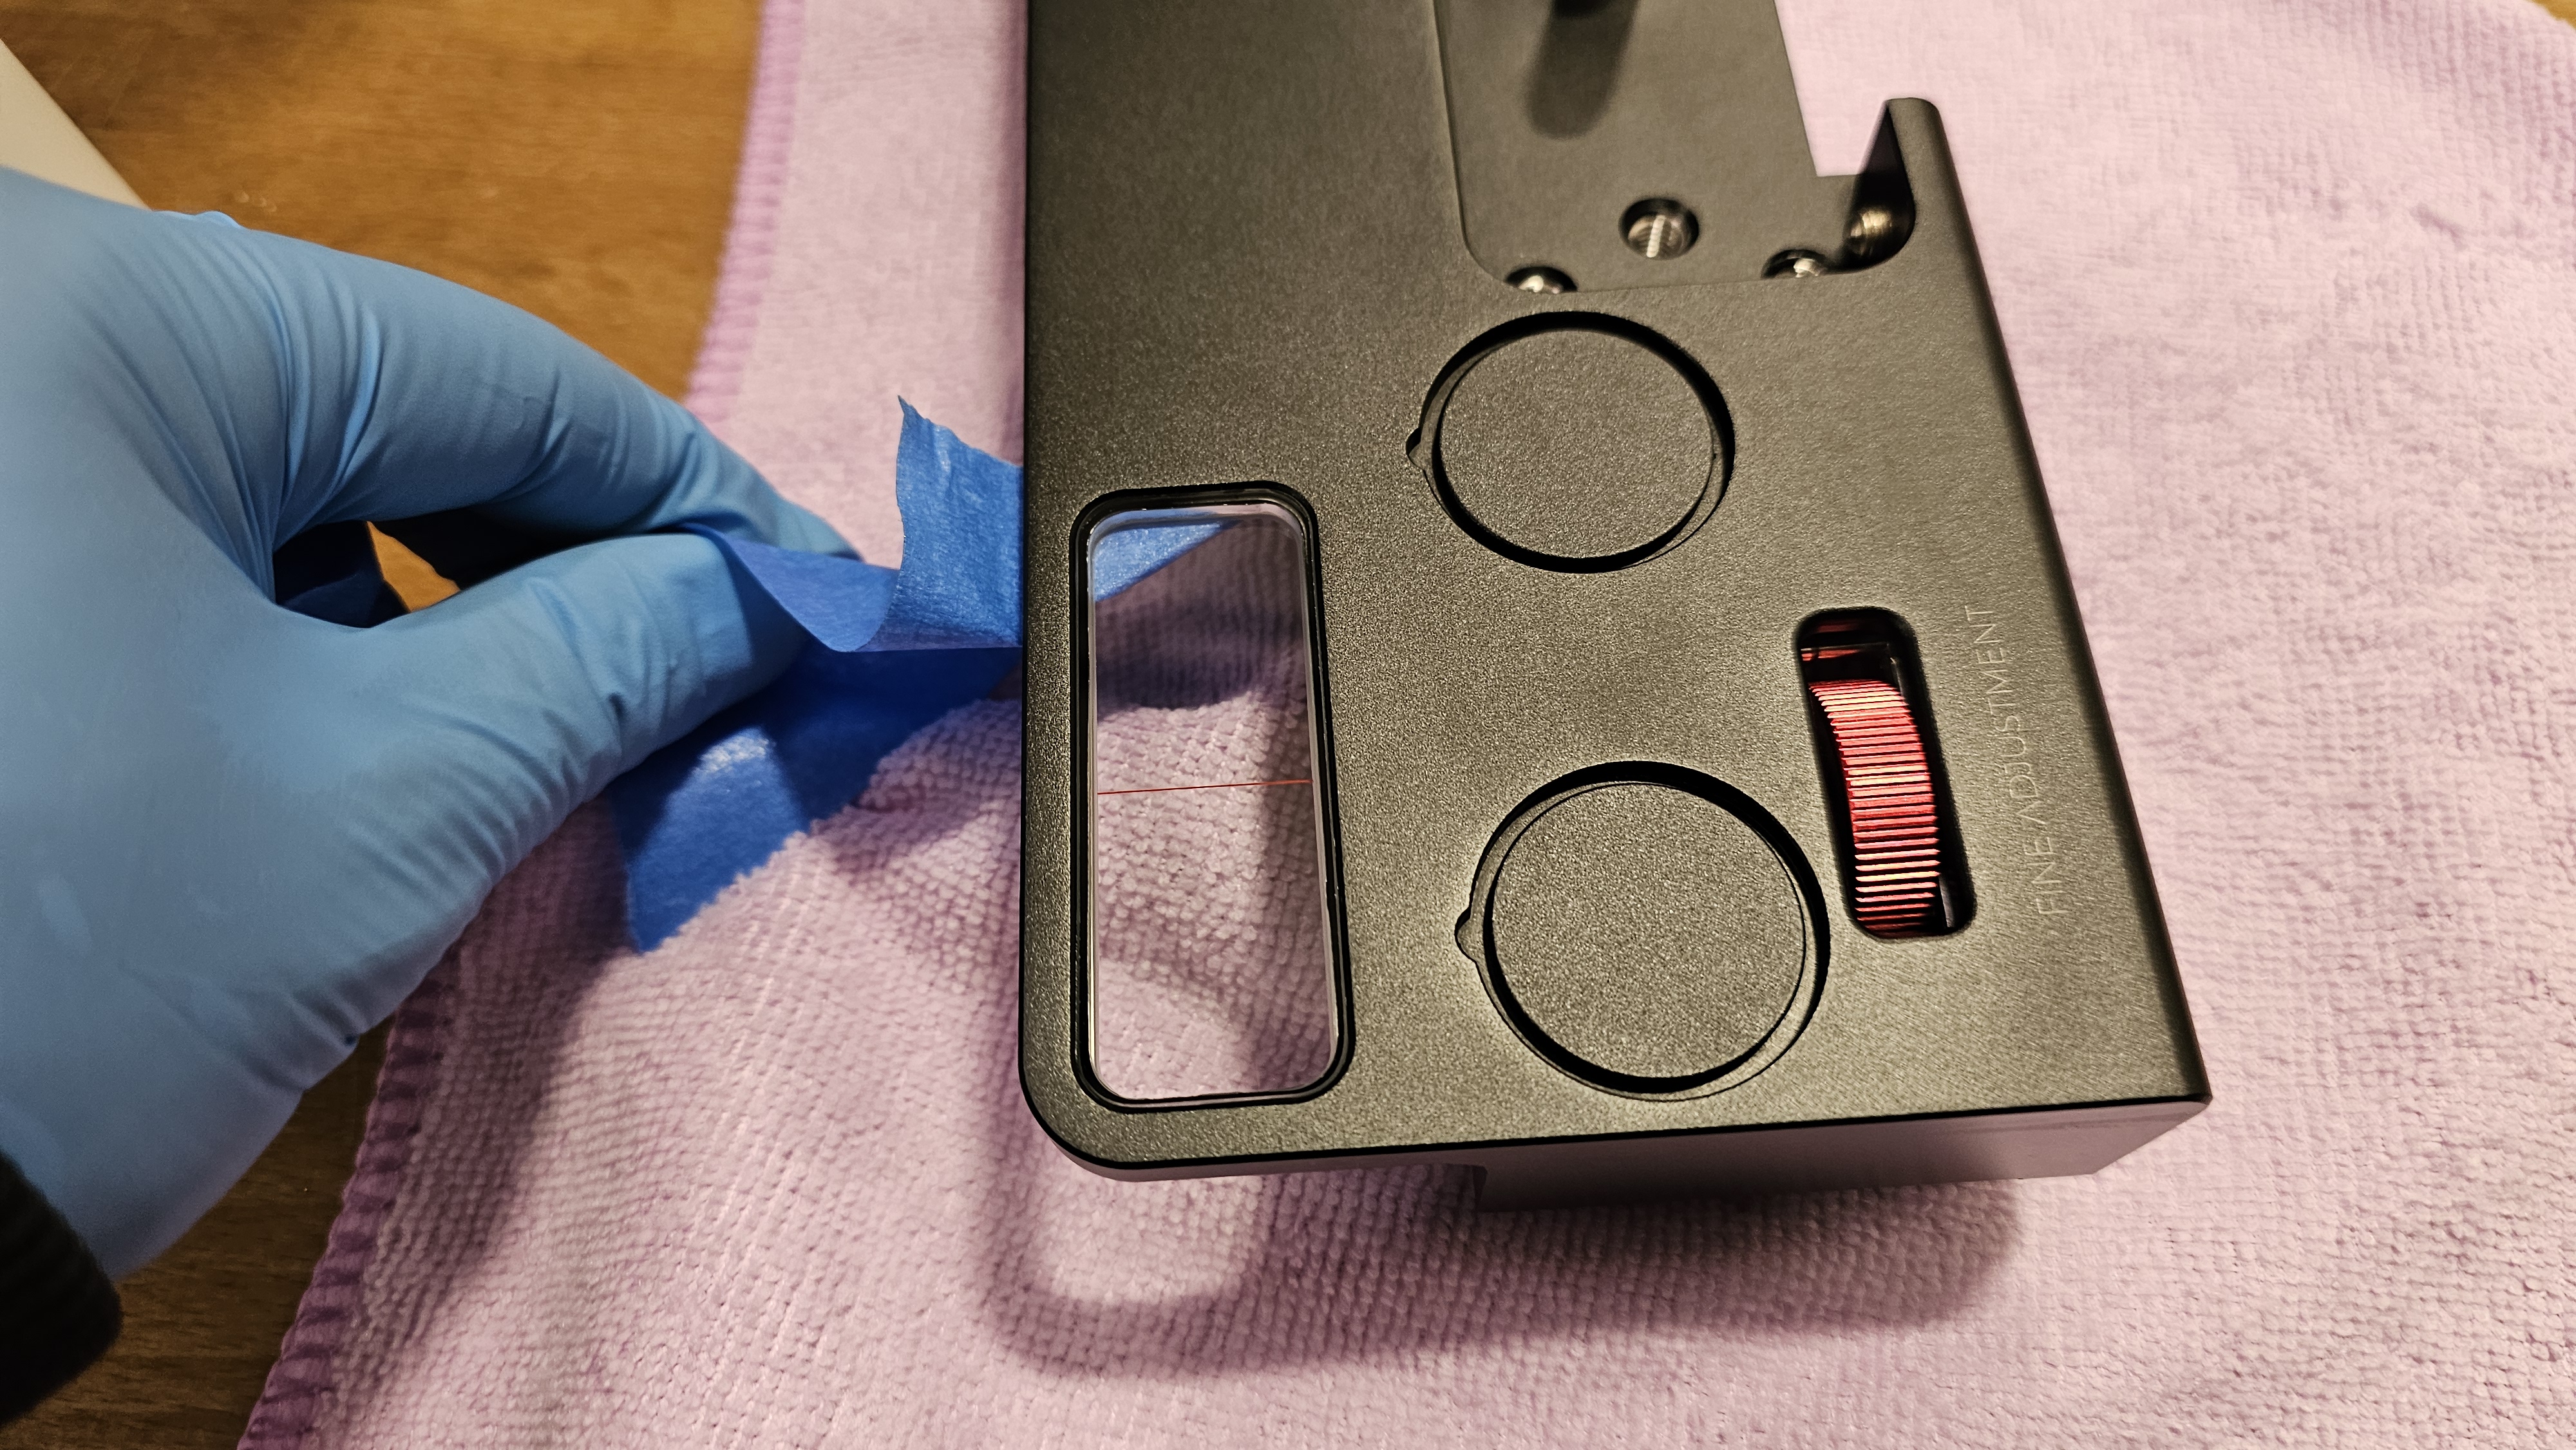
Cure the touch-up resin with the UV light as before. Once fully cured, remove all remaining masking tape from the fence body. Peel slowly and at a low angle to avoid lifting any cured resin.
Inspect the completed installation. The viewer should be clear, flush, firmly bonded, and show a clean hairline through the center. The fence slider is now ready to be reinstalled on the rail.
Touch-Up Complete — All Tape Removed
Final — blue tape being removed from viewer socket to reveal finished, clean viewer installation
i

For questions about the Big Eye fence viewer replacement or to order a replacement viewer, please contact our support team.

Was this article helpful?

That’s Great!

Thank you for your feedback

Sorry! We couldn't be helpful

Thank you for your feedback

Let us know how can we improve this article!

Select at least one of the reasons
CAPTCHA verification is required.

Feedback sent

We appreciate your effort and will try to fix the article